Linking to Content In Drupal
If you’re using the Pathauto Module, you know that you can create custom path patterns for nodes, taxonomies and users. This is great for SEO, as well as keeping content organized. However, one of the side effects of using Pathauto is that the paths to your content can change.
For example, I use the following pattern for my Article content type:
This means that if I change the title of an Article, the URL changes as well. If I am linking to this content elsewhere on my site, that link will now be broken.
Luckily, there are two Drupal modules that make linking to content easy, and consistent.
CKEditor Link Tutorial
If you’re using a WYSIWYG editor, then CKEditor Link is a must have. It links to the internal Drupal path (ex. /node/1) of each piece of content, rather than the the Pathauto path. It also has a nifty auto complete feature that makes finding the content easy.
First, you will need to have a WYSIWYG editor installed. I prefer using WYSIWYG with CKEditor. Then, install CKEditor Link.
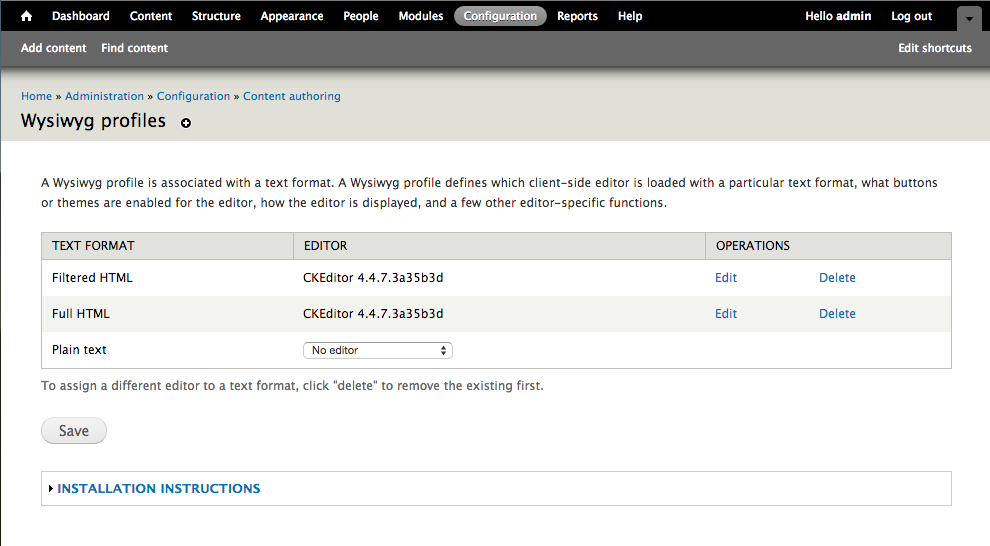
Navigate to the WYSIWYG profiles page *(admin/config/content/wysiwyg), then pick a text format to edit.
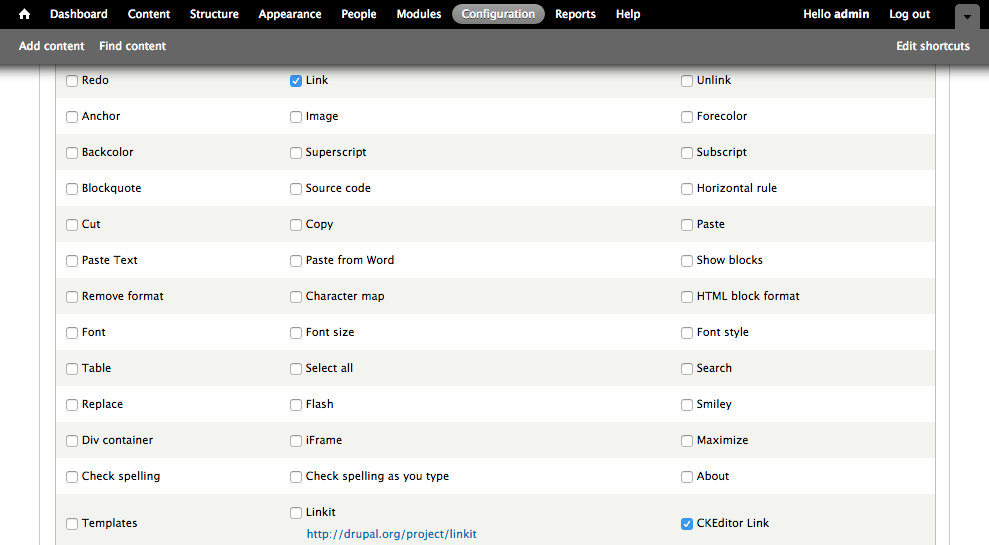
Once on a text format edit page, make sure to select Link and CKEditor Link under Buttons and Plugins. Click save.
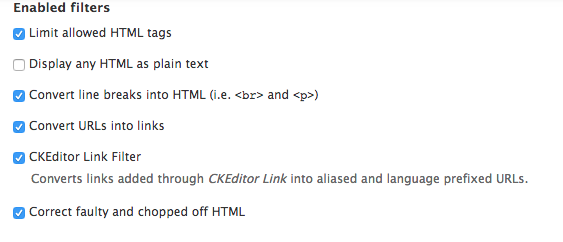
Finally, make sure to enable CKEditor Link Filter on the text format configuration page. For example, if you are applying this to the Filtered HTML text format, you would navigate to this page (admin/config/content/formats/filtered_html).
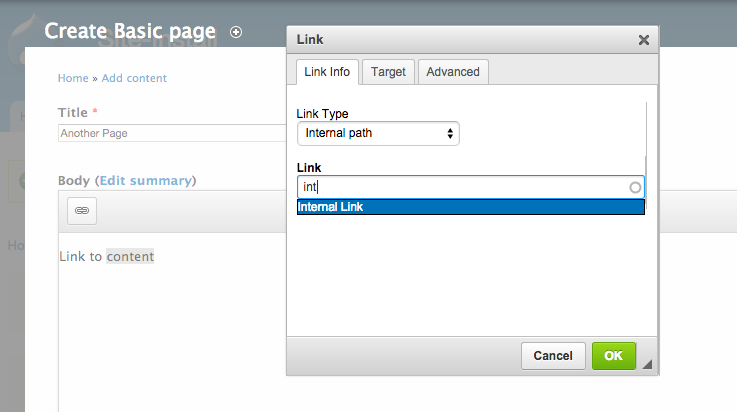
Now, when you are trying to link to a piece of content via the WYSIWYG Editor, you can chose Internal path under Link Type. If you begin to type the title of a piece of content, it will auto complete.
Linkit Tutorial
CKEditor Link is great for a field that uses WYSIWYG, but what if you need to link to Drupal content via a Link field? This is where Linkit Module comes in handy.
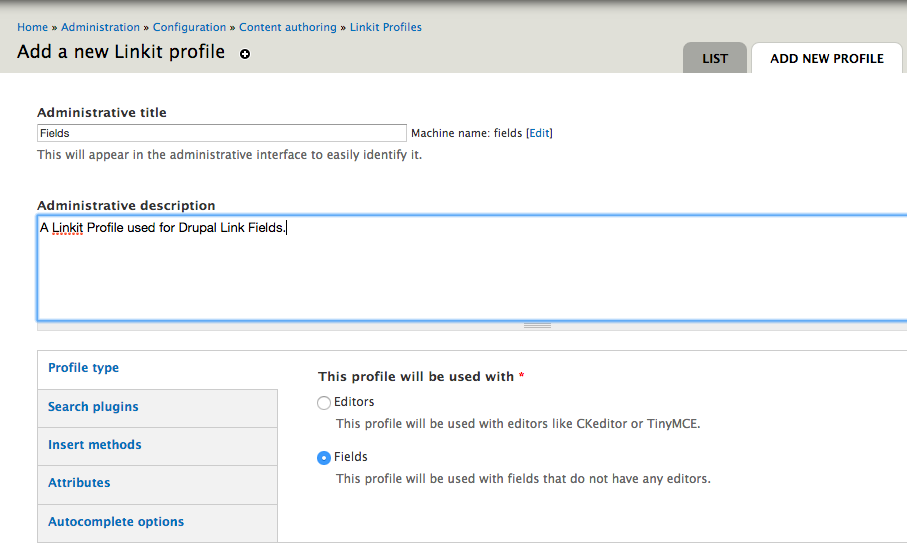
Once installed, you will need to add a Linkit Profile (admin/config/content/linkit/add). Since we are working with fields, choose Fields under the Profile Type tab.
Under the Search plugins tab choose the entities you wish Linkit to be able to reference. For this tutorial I will limit my results to nodes.
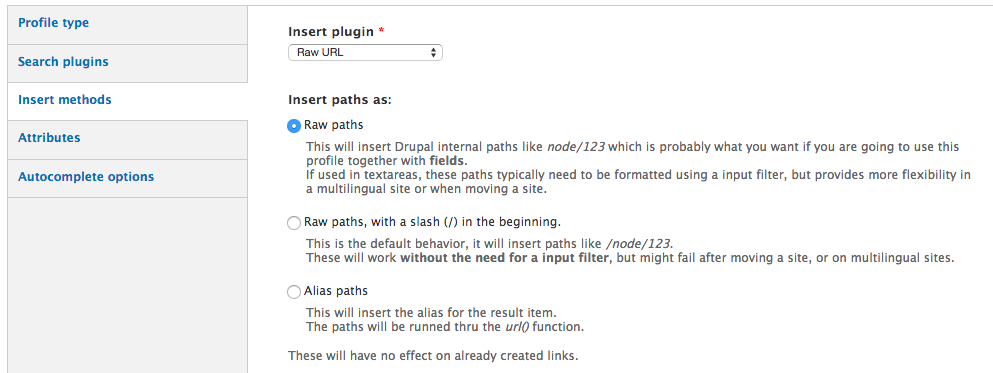
Next, under the Insert methods tab, choose Raw URL for Insert plugin and Raw paths for Insert paths as:.
For this tutorial we will not need to configure anything under the Attributes or Autocomplete options tabs.
Now navigate to a link field type, and click edit.
Then, scroll until you see LINKIT FIELD SETTINGS. Click Enable Linkit for this field. and select the profile you just created.
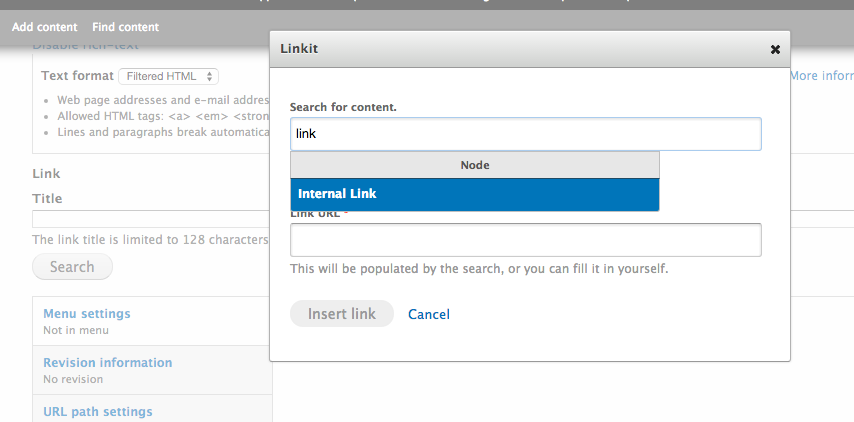
You will now see a Search button on this link field. This will allow you to search content via an auto complete widget, and link to it.

