Ruby on Rails with React Tutorial
Introduction
Many Rails+React tutorials demonstrate how to create an API only application using Rails, and then create a separate front-end application to digest the API with React. Other React tutorials have you work with something like Firebase to handle the back-end of the application.
Although both of these approaches are common and acceptable, I wanted to create an application that has all the benefits of a non API only Rails application, without the limitations and vendor lock-in of a third party service like Firebase.
For this application we are going to build both the front-end and back-end within a single Rails application. However, we’re only going to load React on a specific part of a specific view.
Some of the advantages for building both the front-end and back-end within a single Rails application are as follows:
- We can build out other pages using
.erbfiles. Not everything needs to be in React. Imagine if we want to add a contact us page, or an about page in the future? It would be cumbersome to need to build these pages in React. - We can easily and quickly build an authentication system using Devise. This will handle authentication across the entire application, and will make handling requests in our API a lot easier.
- Rails already does a great job of making an application feel like a single page application with Turbolinks. For example, this will make logging in an out of the application feel like it’s built in React.
- Rails handles tricky security considerations that are easily overlooked when building an API.
- Rails makes validating our models incredibly easy.
Considerations
We will be deviating from a traditional Rails application by replacing a specific view with a React application. This means that we will no longer be able to use some of the features we take for granted in a Rails application, like form helpers or flash notices. Below are some often overlooked features that we will be responsible for.
- API authorization
- API versioning
- Setting HTTP status codes
- Form validation on the front-end
- Handling errors
- Debouncing requests
- CSRF Countermeasures
Step 1: Create a New Rails Application
In a new terminal window, run the following commands.
rails new todo-application -d=postgresql --webpacker=react
cd todo-application
rails db:create
rails s
Notes:
- We append
--webpacker=reactto therails newcommand in order to install React and its dependencies. This command also generates a sample React component atapp/javascript/packs/hello_react.jsx, and creates a file to manage Webpack atconfig/webpacker.yml. - We append
-d=postgresqlto therails newcommand in order to use PostgreSQL as the default database. This is personal preference, but something I recommend since it makes deploying to Heroku easier.
If you open up a browser and navigate to http://localhost:3000/ you should see the following:
Create Homepage
In a new terminal window run the following command.
rails g controller pages home my_todo_items
This command generates and modifies a lot of files, but all we will care about are app/views/pages/ and app/controllers/pages_controller.rb.
Open up config/routes.rb and replace get 'pages/home' with root 'pages#home'
# config/routes.rb

Rails.application.routes.draw do
  root "pages#home"
  get "pages/my_todo_items"
end
If you open up a browser and navigate to http://localhost:3000/ you should see the following:
Load Bootstrap
In the interest of time, we’re going to use Bootstrap to style our application. Luckily Bootstrap can be installed as a dependency, which means we can use it for our React application, as well as regular Rails .erb files.
In a new terminal window run the following command.
yarn add bootstrap jquery popper.js
Open app/javascript/packs/application.js add the following.
    // This file is automatically compiled by Webpack, along with any other files
    // present in this directory. You're encouraged to place your actual application logic in
    // a relevant structure within app/javascript and only use these pack files to reference
    // that code so it'll be compiled.

    require("@rails/ujs").start();
    require("turbolinks").start();
    require("@rails/activestorage").start();
    require("channels");

    // Uncomment to copy all static images under ../images to the output folder and reference
    // them with the image_pack_tag helper in views (e.g <%= image_pack_tag 'rails.png' %>)
    // or the `imagePath` JavaScript helper below.
    //
    // const images = require.context('../images', true)
    // const imagePath = (name) => images(name, true)
    require("bootstrap");
    import "bootstrap/dist/css/bootstrap";
Open app/views/layouts/application.html.erb and add <%= stylesheet_pack_tag 'application' %>.
<pre>
  <code class="language-erb">
    <!DOCTYPE html>
    <html>
      <head>
        <title>TodoApplication</title>
        <%= csrf_meta_tags %>
        <%= csp_meta_tag %>

        <%= stylesheet_link_tag 'application', media: 'all', 'data-turbolinks-track': 'reload' %>
        <%= javascript_pack_tag 'application', 'data-turbolinks-track': 'reload' %>

        <%# ℹ️ Add this line %>
        <%= stylesheet_pack_tag 'application' %>

      </head>

      <body>
        <%= yield %>
      </body>
    </html>
  </code>
</pre>
If you open up a browser and navigate to http://localhost:3000/ you should notice that Bootstrap is now affecting site styes.
Load Sample React Application
Finally, we want to ensure that both React and webpacker are working properly. To do so, we will temporarily load the sample React application that shipped with our Rails application. Open up app/javascript/packs/application.js and add require("./hello_react");
    // This file is automatically compiled by Webpack, along with any other files
    // present in this directory. You're encouraged to place your actual application logic in
    // a relevant structure within app/javascript and only use these pack files to reference
    // that code so it'll be compiled.

    require("@rails/ujs").start();
    require("turbolinks").start();
    require("@rails/activestorage").start();
    require("channels");

    // Uncomment to copy all static images under ../images to the output folder and reference
    // them with the image_pack_tag helper in views (e.g <%= image_pack_tag 'rails.png' %>)
    // or the `imagePath` JavaScript helper below.
    //
    // const images = require.context('../images', true)
    // const imagePath = (name) => images(name, true)
    require("./hello_react");
    require("bootstrap");
    import "bootstrap/dist/css/bootstrap";
If you open up a browser and navigate to http://localhost:3000/ you should notice that the sample React application has loaded, and is displaying Hello React!.

Step 2: Install and Configure Devise
In order for someone to use our application, they’ll need to create an account. Instead of building an authentication system from scratch, we’ll use devise. Devise is a battle tested, well documented authentication solution for Rails.
- Open up your
Gemfileand addgem 'devise', '~> 4.7', '>= 4.7.1'. - In a terminal window run
bundle install. - Then run
rails generate devise:install. - Open
config/environments/development.rband addconfig.action_mailer.default_url_options = { host: 'localhost', port: 3000 }.
Rails.application.configure do
  # config/environments/development.rb

  config.action_mailer.default_url_options = { host: "localhost", port: 3000 }
end
Generate a User Model
Now we need to generate a User model. This model will eventually be associated with the TodoItem model.
- In a terminal window run
rails generate devise User. - Then run
rails db:migrate -
Open up
db/seeds.rband add the following.# db/seeds.rb 2.times do |i| User.create( email: "user-#{i + 1}@example.com", password: "password", password_confirmation: "password", ) end - Finally in a terminal window run
rails db:seed
Build a Header
Now we need a way for users to login and out of our application. Don’t get too bogged down on these steps, since they have less to do with React, and more to do with styling.
- In a terminal window run
mkdir app/views/shared. - Then run
touch app/views/shared/_flash.html.erb. - Then run
touch app/views/shared/_navigation.html.erb. -
Open up
app/views/shared/_flash.html.erband add the following.# app/views/shared/_flash.html.erb <% flash.each do |key, value| %> <div class="container"> <div class="alert <%= key == 'notice' ? 'alert-primary' : 'alert-danger' %>" role="alert"> <%= value %> <button type="button" class="close" data-dismiss="alert" aria-label="Close"> <span aria-hidden="true">×</span> </button> </div> </div> <% end %> -
Open up
app/views/shared/_navigation.html.erband add the following.<!-- app/views/shared/_navigation.html.erb --> <nav class="navbar navbar-expand-lg navbar-light bg-light mb-5"> <div class="container"> <%= link_to "Rails React Example", root_path, class: "navbar-brand" %> <button class="navbar-toggler" type="button" data-toggle="collapse" data-target="#navbarNav" aria-controls="navbarNav" aria-expanded="false" aria-label="Toggle navigation"> <span class="navbar-toggler-icon"></span> </button> <div class="collapse navbar-collapse justify-content-end" id="navbarNav"> <ul class="navbar-nav"> <li class="nav-item"> <% if user_signed_in? %> <%= link_to('Logout', destroy_user_session_path, method: :delete, class: "nav-link") %> <% else %> <%= link_to('Login', new_user_session_path, class: "nav-link") %> <% end %> </li> </ul> </div> </div> </nav>The only part that really matters here is the following:
<% if user_signed_in? %>
  <%= link_to('Logout', destroy_user_session_path, method: :delete, class: "nav-link") %>
<% else %>
  <%= link_to('Login', new_user_session_path, class: "nav-link") %>
<% end %>
This conditional toggles a Log In link or a Log Out link.
-
Load these partials into
app/views/layouts/application.html.erb.<!-- app/views/layouts/application.html.erb --> <!DOCTYPE html> <html> <head> <title>TodoApplication</title> <%= csrf_meta_tags %> <%= csp_meta_tag %> <%= stylesheet_link_tag 'application', media: 'all', 'data-turbolinks-track': 'reload' %> <%= javascript_pack_tag 'application', 'data-turbolinks-track': 'reload' %> <%= stylesheet_pack_tag 'application' %> </head> <body> <%# ℹ️ Load these partials %> <%= render "shared/navigation" %> <%= render "shared/flash" %> <%= yield %> </body> </html> -
As a final step, let’s add a container to the page, as well as responsive meta tag.
<!-- app/views/layouts/application.html.erb -->
<!DOCTYPE html>
<html>
  <head>
    <title>TodoApplication</title>
    <%= csrf_meta_tags %>
    <%= csp_meta_tag %>

    <%= stylesheet_link_tag 'application', media: 'all', 'data-turbolinks-track': 'reload' %>
    <%= javascript_pack_tag 'application', 'data-turbolinks-track': 'reload' %>
    <%= stylesheet_pack_tag 'application' %>

    <%# ℹ️ Add meta-tag %>
    <meta name="viewport" content="width=device-width, initial-scale=1, shrink-to-fit=no">

  </head>

  <body>
    <%= render "shared/navigation" %>
    <%= render "shared/flash" %>

    <%# ℹ️ Add container %>
    <div class="container">
      <%= yield %>
    </div>
  </body>
</html>
If you open up a browser and navigate to http://localhost:3000/ you should see the following.

Create Homepage for Authorized Users
Now that we have a way to login and out of our application, let’s add a homepage that only authentication users will see. This page will eventually display our React application.
- Open up
config/routes.rband add the following:
    # config/routes.rb

    Rails.application.routes.draw do
      devise_for :users
      authenticated :user do
        root "pages#my_todo_items", as: :authenticated_root
      end
      root "pages#home"
    end
You can read more about this in the devise documentation.
Style Login Page (Optional)
Right now our application’s login page is not styled as seen below.
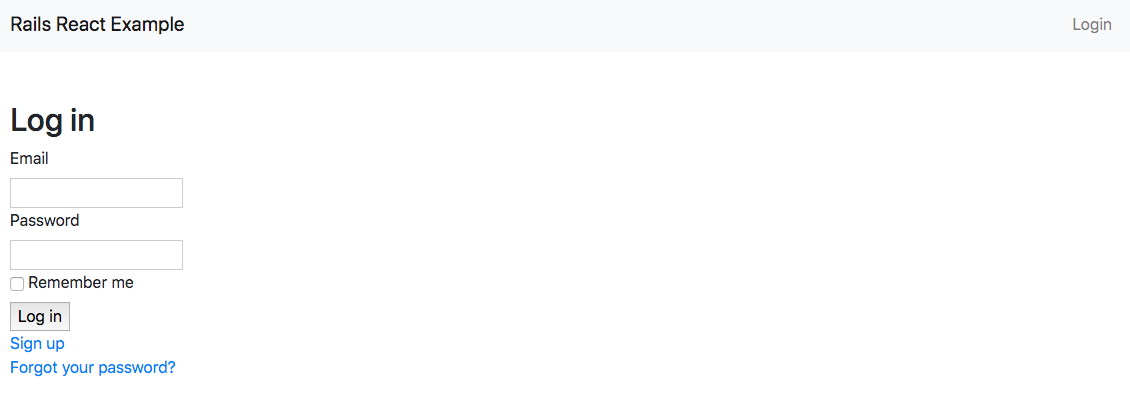
Luckily devise gives us the option to style these views.
- In a terminal window run
rails generate devise:views. -
Open up
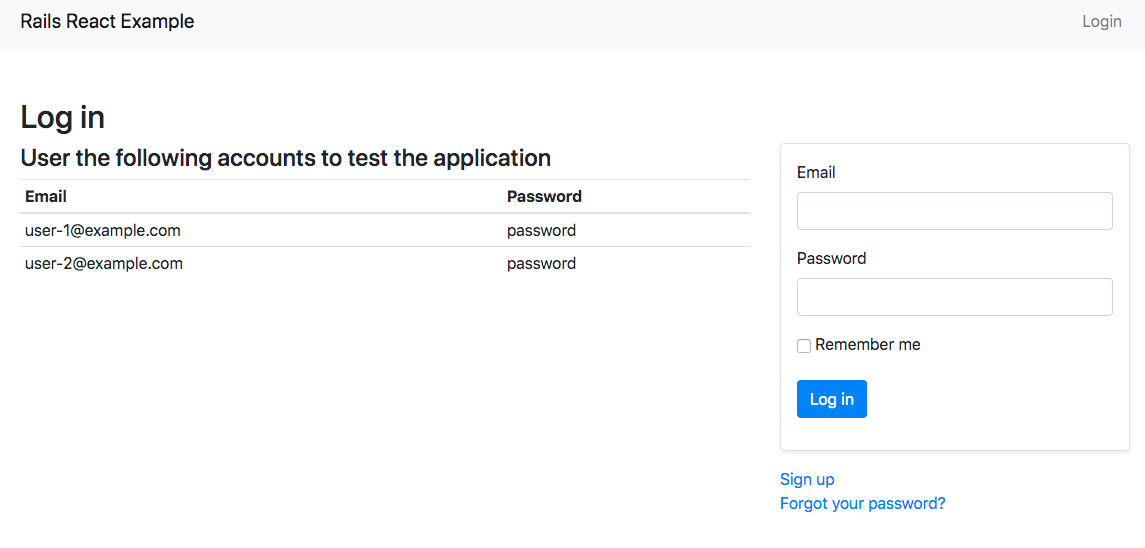
app/views/devise/sessions/new.html.erband add the following.- Note that I am simply adjusting the markup, and not affecting functionality. This is strictly a cosmetic edit.
<!-- app/views/devise/sessions/new.html.erb -->
<h2>Log in</h2>
<div class="row">
  <div class="col-md-6 col-lg-8">
    <h4>User the following accounts to test the application</h4>
    <table class="table table-sm">
      <thead>
        <tr>
          <th scope="col">Email</th>
          <th scope="col">Password</th>
        </tr>
      </thead>
      <tbody>
        <% User.all.each do |user| %>
          <tr>
            <td><%= user.email %></td>
            <td>password</td>
          </tr>
        <% end %>
      </tbody>
    </table>
  </div>
  <div class="col-md-6 col-lg-4">
    <%= form_for(resource, as: resource_name, url: session_path(resource_name), html: { class: "border shadow-sm rounded p-3 mb-3" } ) do |f| %>
      <div class="form-group">
        <%= f.label :email %>
        <%= f.email_field :email, autofocus: true, autocomplete: "email", class: "form-control" %>
      </div>

      <div class="form-group">
        <%= f.label :password %><br />
        <%= f.password_field :password, autocomplete: "current-password", class: "form-control" %>
      </div>

      <% if devise_mapping.rememberable? %>
        <div class="form-group">
          <%= f.check_box :remember_me %>
          <%= f.label :remember_me %>
        </div>
      <% end %>

      <div class="form-group">
        <%= f.submit "Log in", class: "btn btn-primary" %>
      </div>
    <% end %>

    <%= render "devise/shared/links" %>

  </div>
</div>
If you open up a browser and navigate to http://localhost:3000/users/sign_in you should see the following.
Step 3: Create Todo Item Model
Now we need to create a model to that will represent our todo items, and have them associated with our User model.
-
In a terminal window run
rails g model TodoItem title user:references complete:boolean.What we’re doing here is creating a new model named
TodoItem. It will have atitlefield, acompletefield that is simply a boolean, and finally it will be associated with ourUsermodel. -
Open up the newly created migration file
db/migrate/YYYYMMDDHHMMSS_create_todo_items.rband add the following.# db/migrate/YYYYMMDDHHMMSS_create_todo_items.rb class CreateTodoItems < ActiveRecord::Migration[6.0] def change create_table :todo_items do |t| t.string :title t.references :user, null: false, foreign_key: true t.boolean :complete, default: false t.timestamps end end endBy adding
default: false, we’re telling the database that the default value forcompleteon aTodoItemwill befalse. -
In a terminal window run
rails db:migrate
Write Validations
Now that we have a TodoItem model, we should write some validations to ensure any data saved into the database is valid. For example, we don’t want a TodoItem to be saved if there’s no title, or if it’s not associated with a User.
-
Open up
app/models/todo_item.rband add the following.# app/models/todo_item.rb class TodoItem < ApplicationRecord belongs_to :user validates :title, presence: true end
Set a Default Scope
Next we’ll want to ensure that the newest TodoItems appear first when queried. To do this, we can use a default scope.
- Open up
app/models/todo_item.rband add the following.
    # app/models/todo_item.rb

    class TodoItem < ApplicationRecord
      default_scope { order(created_at: :desc) }

      belongs_to :user

      validates :title, presence: true
    end
Create Association Between User and TodoItem
Next we need to create an association between the User and the TodoItem. This has already been started for us in app/models/todo_item.rb with the belongs_to :user line.
-
Open up
app/models/user.rband add the following.# app/models/user.rb class User < ApplicationRecord has_many :todo_items, dependent: :destroy endThis ensures that a
Useris associated with manyTodoItems. It also means that if aUseris deleted, so will their associatedToDoItems.
Add Seed Data
Finally, let’s add some sample data.
-
Open up
db/seeds.rband add the following.# db/seeds.rb 2.times do |i| User.create( email: "user-#{i + 1}@example.com", password: "password", password_confirmation: "password", ) end User.all.each do |u| 10.times do |i| u.todo_items.create( title: "To Do Item #{i + 1} for #{u.email}", complete: i % 3 == 0 ? true : false, ) end endThis simply creates 10
TodoItemsfor eachUser, and marks every third itemcomplete. - In a terminal window run
rails db:seed. -
To ensure everything worked, open up a terminal widow and run
rails c. Once the environment loads, runTodoItem.count. The output should be similar to the following:2.6.3 :001 > TodoItem.count (14.8ms) SELECT COUNT(\*) FROM "todo_items" => 20
Set 4: Create the API
Now that we have our data models, we need to create an API for our React application to digest.
Generate a Controller
- In a new terminal window run
rails g controller api/v1/todo_items.
We pass the command api/v1/todo_items and not todo_items because we want to namespace our API. This is not required, but is encouraged. In the future, other applications could digest our API. If at anytime we were to change our API, we would risk breaking these applications. It’s best to version our API so that other applications can opt-in to new features.
Create Non Authorized End Points
Create Empty Controller Actions
First we need to create an action for each endpoint in our API.
-
Open up
app/controllers/api/v1/todo_items_controller.rband add the following.# app/controllers/api/v1/todo_items_controller.rb class Api::V1::TodoItemsController < ApplicationController before_action :set_todo_item, only: %i[show edit update destroy] def index end def show end def create end def update end def destroy end private def set_todo_item @todo_item = TodoItem.find(params[:id]) end end
The private set_todo_item method will find the TodoItem based on the ID in the URL.
Update Routes
Now we need to create corresponding routes for our controller actions.
- Open up
config/routes.rband add the following.
    # config/routes.rb

    Rails.application.routes.draw do
      devise_for :users
      authenticated :user do
        root "pages#my_todo_items", as: :authenticated_root
      end
      root "pages#home"
      namespace :api, defaults: { format: :json } do
        namespace :v1 do
          resources :todo_items, only: %i[index show create update destroy]
        end
      end
    end
We use a namespace in order to make our routes render at /api/v1/todo_items. This way, we can easily add new versions of our API in the future. We use defaults: { format: :json } to ensure that the data returned from these routes is JSON.
Create jbuilder Files
Normally in Rails there is a corresponding .erb view file for each controller action. However, since we’re building an API we need to create corresponding jbuilder files for each controller actions.
Jbuilder: generate JSON objects with a Builder-style DSL
-
In a new terminal window run the following commands.
mkdir -p app/views/api/v1/todo_items touch app/views/api/v1/todo_items/_todo_item.json.jbuilder touch app/views/api/v1/todo_items/show.json.jbuilder touch app/views/api/v1/todo_items/index.json.jbuilder -
Open
app/views/api/v1/todo_items/_todo_item.json.jbuilderand add the following. This will serve as a reusable partial for other.jbuilderfiles.# app/views/api/v1/todo_items/_todo_item.json.jbuilder json.extract! todo_item, :id, :title, :user_id, :complete, :created_at, :updated_atjson.extract!is a method that takes an object (in this case aTodoItem), and a list of attributes we want to render into JSON. -
Open
app/views/api/v1/todo_items/show.json.jbuilderand add the following.# app/views/api/v1/todo_items/show.json.jbuilder json.partial! "api/v1/todo_items/todo_item", todo_item: @todo_itemjson.partial!will render the_todo_item.json.jbuilderpartial, and takes@todo_itemas an argument. The@todo_itemis handled through our privateset_todo_itemmethod in our controller. -
Open
app/views/api/v1/todo_items/index.json.jbuilderand add the following.# app/views/api/v1/todo_items/index.json.jbuilder json.array! @todo_items, partial: "api/v1/todo_items/todo_item", as: :todo_itemjson.array!will take a list of queriedTodoItemsand pass eachTodoIteminto the_todo_item.json.jbuilderpartial. We still need to add@todo_itemsinto our controllerindexaction.
Update Controller Actions
Now we need to update our controller actions so that we can pass data into our newly created .jbuilder files. For now, we’re just going to updated the index action.
-
Open up
app/controllers/api/v1/todo_items_controller.rband add the following.# app/controllers/api/v1/todo_items_controller.rb class Api::V1::TodoItemsController < ApplicationController def index @todo_items = TodoItem.all end end
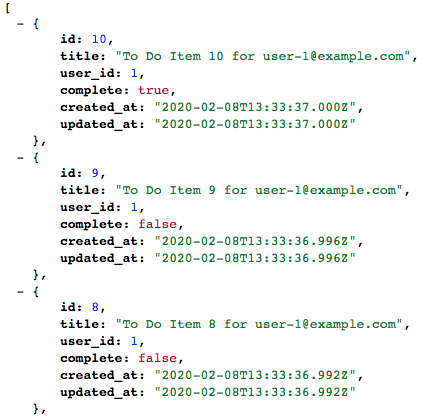
If you open up a browser and navigate to http://localhost:3000/api/v1/todo_items you should see the following.

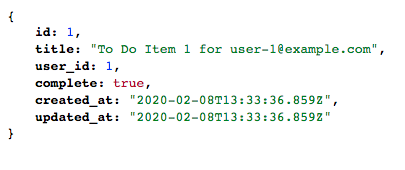
If you open up a browser and navigate to http://localhost:3000/api/v1/todo_items/1 you should see the following.
Authorize End Points
Now that we have a base for our API, you might have noticed a few problems.
- A visitor does not need to be authenticated to visit these endpoints.
- There is no association between a visitor and the
TodoItemsdisplayed.
This is a problem because it means a visitor to our site could go to http://localhost:3000/api/v1/todo_items and see all of the site’s data.
Lock Down The Controller
First we need to lock down our controller by authenticating all requests. Luckily devise has a helper method that allows us to do just this.
-
Open up
app/controllers/api/v1/todo_items_controller.rband addbefore_action :authenticate_user!.# app/controllers/api/v1/todo_items_controller.rb class Api::V1::TodoItemsController < ApplicationController before_action :authenticate_user! before_action :set_todo_item, only: %i[show edit update destroy] endNow that we’re locking down our controller to only authenticated users, we need to associate the
Userwith theTodoItem. -
Open up
app/controllers/api/v1/todo_items_controller.rband add the following private method.# app/controllers/api/v1/todo_items_controller.rb class Api::V1::TodoItemsController < ApplicationController private def set_todo_item @todo_item = TodoItem.find(params[:id]) end def authorized? @todo_item.user == current_user end endDevise has a helper method called
current_userthat returns the current signed-in user. So, our privateauthorized?method will returntrueis the currentTodoItembelongs to thecurrent_user, and false otherwise.Now we need to handle any requests that are not authorized. Meaning, we need to handle any request where the
Useris trying to hit an endpoint that does not belong to them. -
In a new terminal window, run the following commands.
touch app/views/api/v1/todo_items/unauthorized.json.jbuilderThis will create a new
.jbuilderview to handle unauthorized requests. -
Open
app/views/api/v1/todo_items/unauthorized.json.jbuilderand add the following.json.error "You are not authorized to perform this action."This will return a JSON object with an
errorkey with a value of"You are not authorized to perform this action.". Now we need to create a method will conditionally render this view depending on whether or not the current request is authorized. -
Open up
app/controllers/api/v1/todo_items_controller.rband add the following private method.
    # app/controllers/api/v1/todo_items_controller.rb

    class Api::V1::TodoItemsController < ApplicationController
      private

      def set_todo_item
        @todo_item = TodoItem.find(params[:id])
      end

      def authorized?
        @todo_item.user == current_user
      end

      def handle_unauthorized
        unless authorized?
          respond_to { |format| format.json { render :unauthorized, status: 401 } }
        end
      end
    end
This method checks to see if the request is authorized by calling our authorized? private method. If the request is not authorized, we return our unauthorized.json.jbuilder view. Note that we also pass a status of 401.
It’s our responsibly to return the correct HTTP status code when building our API.
Update The Index Action
Right now we’re just displaying all TodoItems through the index action, when we really need to display the current User's TodoItems
- Open up
app/controllers/api/v1/todo_items_controller.rband add the following.
# app/controllers/api/v1/todo_items_controller.rb

class Api::V1::TodoItemsController < ApplicationController
  def index
    @todo_items = current_user.todo_items.all
  end
end
As a test, make sure to logout of of the application. Once logged out, visit http://localhost:3000/api/v1/todo_items. You should see the following.

This response is handled through the unauthorized.json.jbuilder view. Furthermore, if you were to check the network response, you’ll see that it returns a 401.

You’ll remember that our private handle_unauthorized method not only renders the unauthorized.json.jbuilder view, but also returns a 401 status.
Finally, if you login as user-1@example.com and visit http://localhost:3000/api/v1/todo_items, you should only see TodoItems related to you.
Update The Show Action
Now let’s update the empty show action.
- Open up
app/controllers/api/v1/todo_items_controller.rband add the following.
# app/controllers/api/v1/todo_items_controller.rb

class Api::V1::TodoItemsController < ApplicationController
  def show
    if authorized?
      respond_to { |format| format.json { render :show } }
    else
      handle_unauthorized
    end
  end
end
Since we’re running before_action :authenticate_user! before all our actions, we know that a visitor must be authenticated before they can view a TodoItem. However, we need to prevent a visitor from accessing TodoItems that do not belong to them. We check if the current use is authorized with the authorized? private method. If they are, we return app/views/api/v1/todo_items/show.json.jbuilder, otherwise we return app/views/api/v1/todo_items/unauthorized.json.jbuilder.
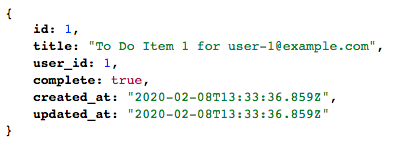
As a test, login as user-1@example.com and visit http://localhost:3000/api/v1/todo_items/1. You should see the following.
Now visit a path the belongs to another User. Assuming you’re logged in as user-1@example.com, visit http://localhost:3000/api/v1/todo_items/20. You should see the following.

Update The Create Action
Now we need a way to create TodoItems with our API.
-
Open up
app/controllers/api/v1/todo_items_controller.rband add the following.# app/controllers/api/v1/todo_items_controller.rb class Api::V1::TodoItemsController < ApplicationController def create @todo_item = current_user.todo_items.build(todo_item_params) if authorized? respond_to do |format| if @todo_item.save format.json do render :show, status: :created, location: api_v1_todo_item_path(@todo_item) end else format.json do render json: @todo_item.errors, status: :unprocessable_entity end end end else handle_unauthorized end end private def todo_item_params params.require(:todo_item).permit(:title, :complete) end endFirst we create a new
@todo_iteminstance variable that builds a newTodoItemfrom thecurrent_user. We pass intodo_item_params, which we declare as a private method. This concept is called strong parameters, and prevents mass assignment.If the request is
authorized?, we then try to post the record to the database. If the item successfully saves, we pass the new@todo_itemintoapp/views/api/v1/todo_items/show.json.jbuilderand which will return the new@todo_item. Note that we also return astatusofcreated. If the@todo_itemdoes not save, we render the errors, and return astatusofunprocessable_entity.Since we don’t have a front-end yet, there’s no way for us to create a new
TodoItemin the browser. However, we can still test that thecreateaction is working by using the developer console. - First, login to the application as user-1@example.com.
- Then, navigate to the homepage.
-
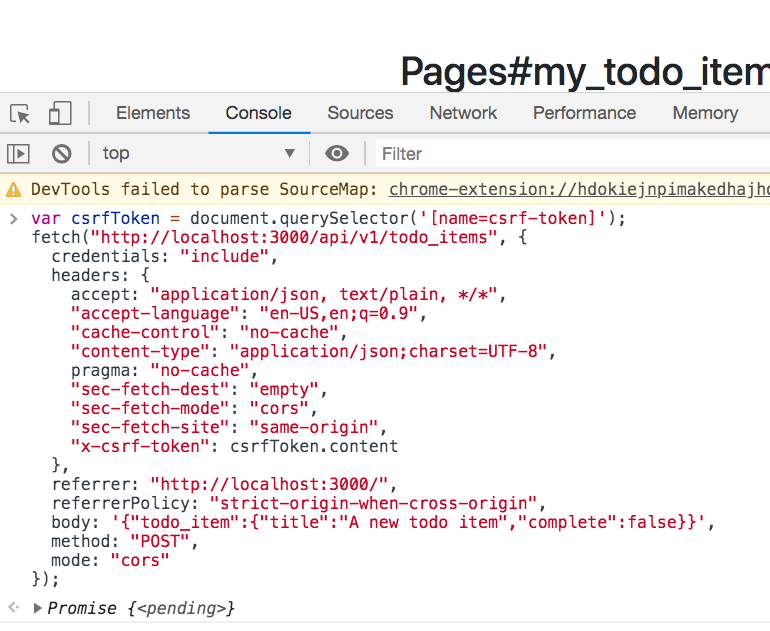
Open up the developer console and paste the following and hit enter.
var csrfToken = document.querySelector("[name=csrf-token]");
fetch("http://localhost:3000/api/v1/todo*items", {
  credentials: "include",
  headers: {
    accept: "application/json, text/plain, */_",
    "accept-language": "en-US,en;q=0.9",
    "cache-control": "no-cache",
    "content-type": "application/json;charset=UTF-8",
    pragma: "no-cache",
    "sec-fetch-dest": "empty",
    "sec-fetch-mode": "cors",
    "sec-fetch-site": "same-origin",
    "x-csrf-token": csrfToken.content,
  },
  referrer: "http://localhost:3000/",
  referrerPolicy: "strict-origin-when-cross-origin",
  body: '{"todo_item":{"title":"A new todo item","complete":false}}',
  method: "POST",
  mode: "cors",
});
For reference, it should look like the following.
To verify that the new
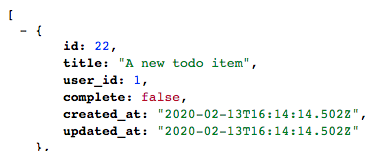
TodoItemwas saved, navigate to http://localhost:3000/api/v1/todo_items.Don’t get too bogged down on this since it’s really just a demonstration. All we’re doing is manually making a
POSTrequest to our API. Our React application will take care of this for us. One thing to note is that we have to pass thex-csrf-tokeninto theheader. This concept has nothing to do with React, and is a Rails convention for securing an application.By default, Rails includes an unobtrusive scripting adapter, which adds a header called X-CSRF-Token with the security token on every non-GET Ajax call. Without this header, non-GET Ajax requests won’t be accepted by Rails. When using another library to make Ajax calls, it is necessary to add the security token as a default header for Ajax calls in your library. To get the token, have a look at tag printed by <%= csrf_meta_tags %> in your application view.
On every page of our Rails application, there is a
meta_tagwith acsrf-token. This token needs to be passed into any request, which is whatvar csrfToken = document.querySelector('[name=csrf-token]');does.As a final test, let’s post an invalid
TodoItemto ensure it is not saved. - Assuming you’re still logged into the application, open up the developer console and paste the following and hit enter. Note that
body: '{"todo_item":{"title":"","complete":false}}',has a blanktitle. This is not valid according to our validation inapp/models/todo_item.rb.

    var csrfToken = document.querySelector("[name=csrf-token]");
    fetch("http://localhost:3000/api/v1/todo/items", {
      credentials: "include",
      headers: {
        accept: "application/json, text/plain, /_",
        "accept-language": "en-US,en;q=0.9",
        "cache-control": "no-cache",
        "content-type": "application/json;charset=UTF-8",
        pragma: "no-cache",
        "sec-fetch-dest": "empty",
        "sec-fetch-mode": "cors",
        "sec-fetch-site": "same-origin",
        "x-csrf-token": csrfToken.content,
      },
      referrer: "http://localhost:3000/",
      referrerPolicy: "strict-origin-when-cross-origin",
      body: '{"todo_item":{"title":"","complete":false}}',
      method: "POST",
      mode: "cors",
    });
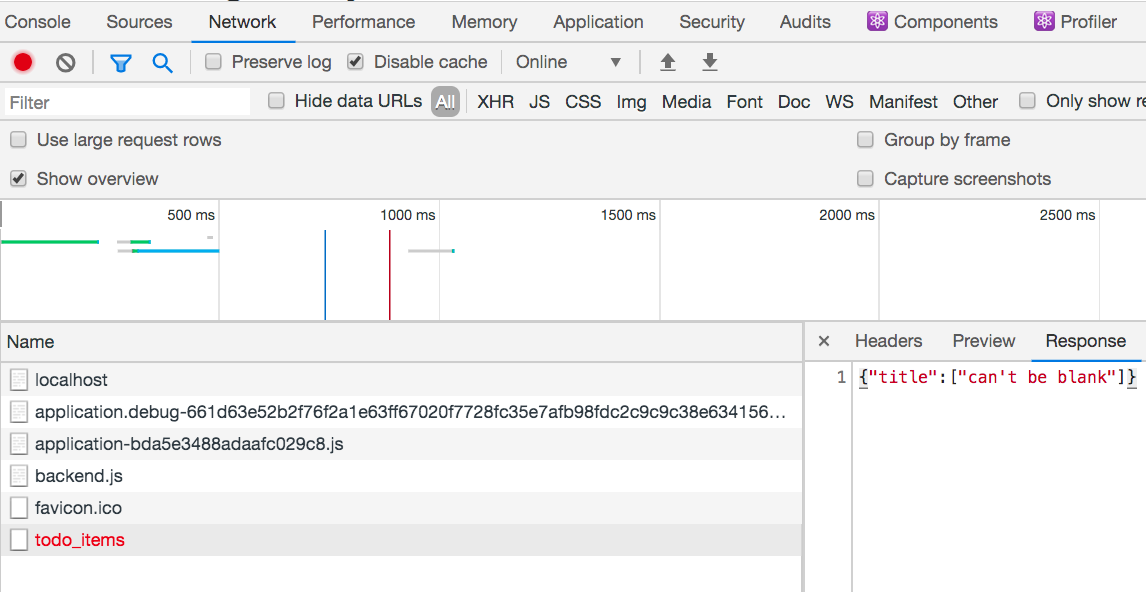
If you open up your network tab you should see the following under Headers
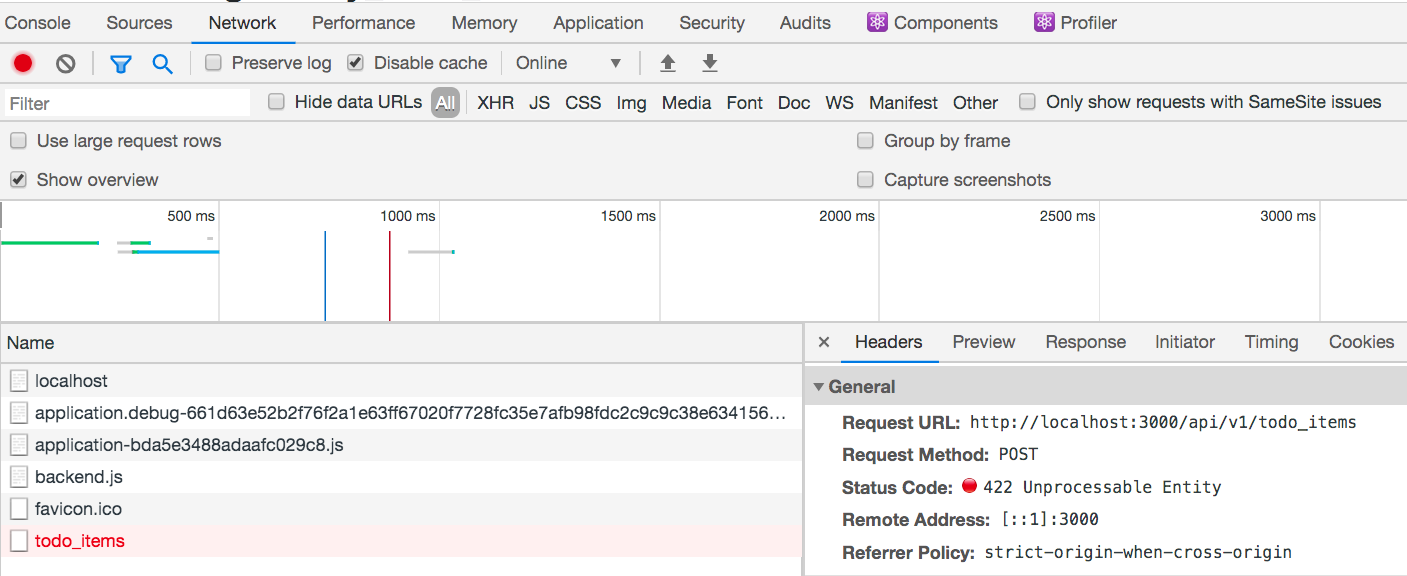
Furthermore, if you look under Response you’ll see the response.
Update The Update Action
Building our update action will be similar to the steps to updating our create action.
-
Open up
app/controllers/api/v1/todo_items_controller.rband add the following.# app/controllers/api/v1/todo_items_controller.rb class Api::V1::TodoItemsController < ApplicationController def update if authorized? respond_to do |format| if @todo_item.update(todo_item_params) format.json do render :show, status: :ok, location: api_v1_todo_item_path(@todo_item) end else format.json do render json: @todo_item.errors, status: :unprocessable_entity end end end else handle_unauthorized end end endIf the request is
authorized?, we then try to post the record to the database. If the item successfully saves, we pass the updated@todo_itemintoapp/views/api/v1/todo_items/show.json.jbuilderand which will return the updated@todo_item. Note that we also return astatusofok. If the@todo_itemdoes not save, we render the errors, and return astatusofunprocessable_entity.Since we don’t have a front-end yet, there’s no way for us to update a existing
TodoItemin the browser. However, we can still test that theupdateaction is working by using the developer console. - First, login to the application as user-1@example.com.
- Then, navigate to the homepage.
-
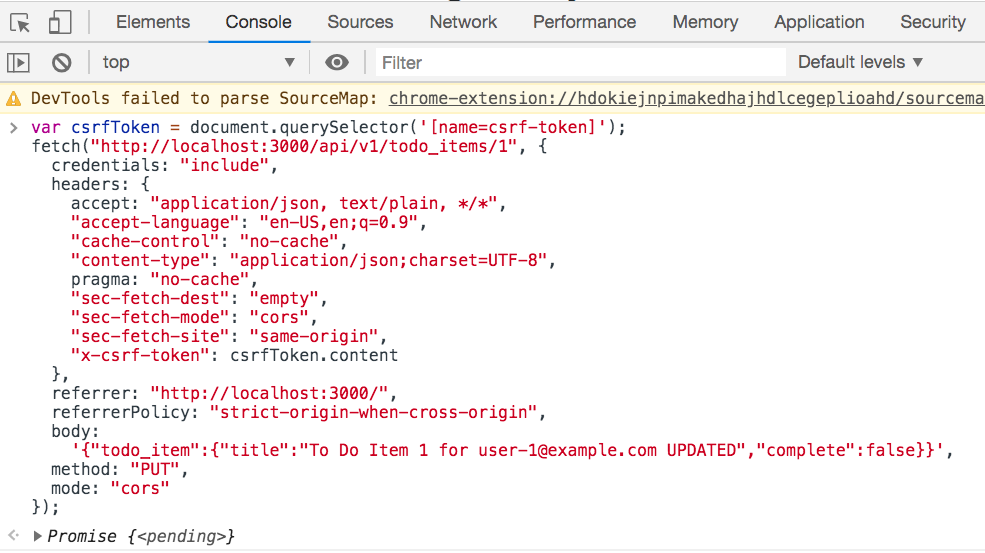
Open up the developer console and paste the following and hit enter. Make sure that http://localhost:3000/api/v1/todo_items/1 exists first.
var csrfToken = document.querySelector("[name=csrf-token]");
fetch("http://localhost:3000/api/v1/todo*items/1", {
  credentials: "include",
  headers: {
    accept: "application/json, text/plain, */_",
    "accept-language": "en-US,en;q=0.9",
    "cache-control": "no-cache",
    "content-type": "application/json;charset=UTF-8",
    pragma: "no-cache",
    "sec-fetch-dest": "empty",
    "sec-fetch-mode": "cors",
    "sec-fetch-site": "same-origin",
    "x-csrf-token": csrfToken.content,
  },
  referrer: "http://localhost:3000/",
  referrerPolicy: "strict-origin-when-cross-origin",
  body: '{"todo_item":{"title":"To Do Item 1 for user-1@example.com UPDATED","complete":false}}',
  method: "PUT",
  mode: "cors",
});
For reference, it should look like the following.
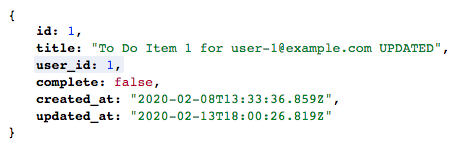
To verify that the
TodoItemwas updated, navigate to http://localhost:3000/api/v1/todo_items/1.As a final test, let’s post an invalid
TodoItemto ensure it is not saved. - Assuming you’re still logged into the application, open up the developer console and paste the following and hit enter. Note that
body: '{"todo_item":{"title":"","complete":false}}',has a blanktitle. This is not valid according to our validation inapp/models/todo_item.rb.
    var csrfToken = document.querySelector("[name=csrf-token]");
    fetch("http://localhost:3000/api/v1/todo*items/1", {
      credentials: "include",
      headers: {
        accept: "application/json, text/plain, */_",
        "accept-language": "en-US,en;q=0.9",
        "cache-control": "no-cache",
        "content-type": "application/json;charset=UTF-8",
        pragma: "no-cache",
        "sec-fetch-dest": "empty",
        "sec-fetch-mode": "cors",
        "sec-fetch-site": "same-origin",
        "x-csrf-token": csrfToken.content,
      },
      referrer: "http://localhost:3000/",
      referrerPolicy: "strict-origin-when-cross-origin",
      body: '{"todo_item":{"title":"","complete":false}}',
      method: "PUT",
      mode: "cors",
    });
If you open up your network tab you should see the following under Headers

Furthermore, if you look under Response you’ll see the response.

Update The Update Destroy
Now all we need to do is update our destroy action.
-
Open up
app/controllers/api/v1/todo_items_controller.rband add the following.# app/controllers/api/v1/todo_items_controller.rb class Api::V1::TodoItemsController < ApplicationController def destroy if authorized? @todo_item.destroy respond_to { |format| format.json { head :no_content } } else handle_unauthorized end end endIf the request is
authorized?, we then destroy the record. If the item is successfully destroyed, we return astatusofno_content.Since we don’t have a front-end yet, there’s no way for us to destroy an existing
TodoItemin the browser. However, we can still test that thedestroyaction is working by using the developer console. - First, login to the application as user-1@example.com.
- Then, navigate to the homepage.
-
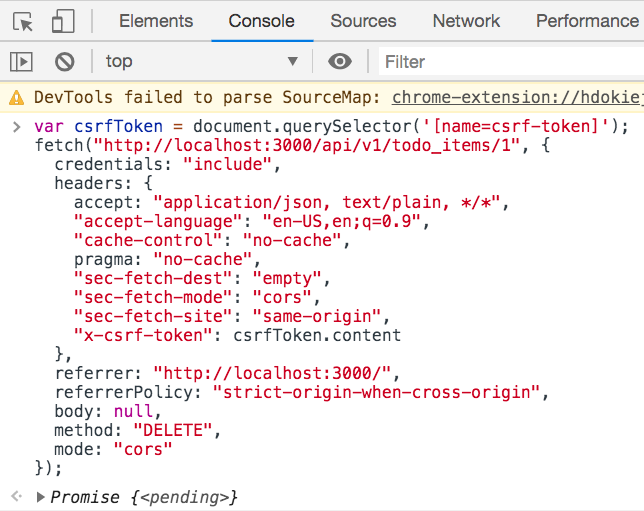
Open up the developer console and paste the following and hit enter. Make sure that http://localhost:3000/api/v1/todo_items/1 exists first.
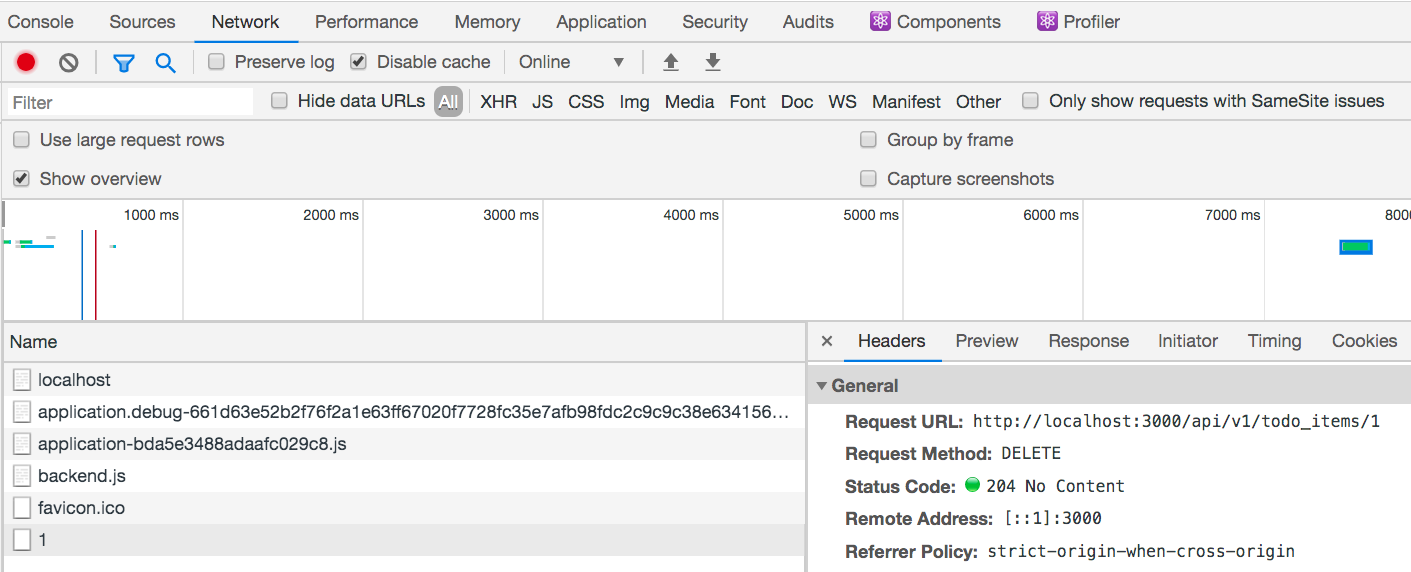
var csrfToken = document.querySelector("[name=csrf-token]");
fetch("http://localhost:3000/api/v1/todo*items/1", {
  credentials: "include",
  headers: {
    accept: "application/json, text/plain, */_",
    "accept-language": "en-US,en;q=0.9",
    "cache-control": "no-cache",
    pragma: "no-cache",
    "sec-fetch-dest": "empty",
    "sec-fetch-mode": "cors",
    "sec-fetch-site": "same-origin",
    "x-csrf-token": csrfToken.content,
  },
  referrer: "http://localhost:3000/",
  referrerPolicy: "strict-origin-when-cross-origin",
  body: null,
  method: "DELETE",
  mode: "cors",
});
For reference, it should look like the following.
If you open up your network tab you should see the following under Headers
To confirm the
TodoItemwas successfully destroyed, navigate to http://localhost:3000/api/v1/todo_items/1. You should see the following.As a final test, let’s confirm we cannot destroy another
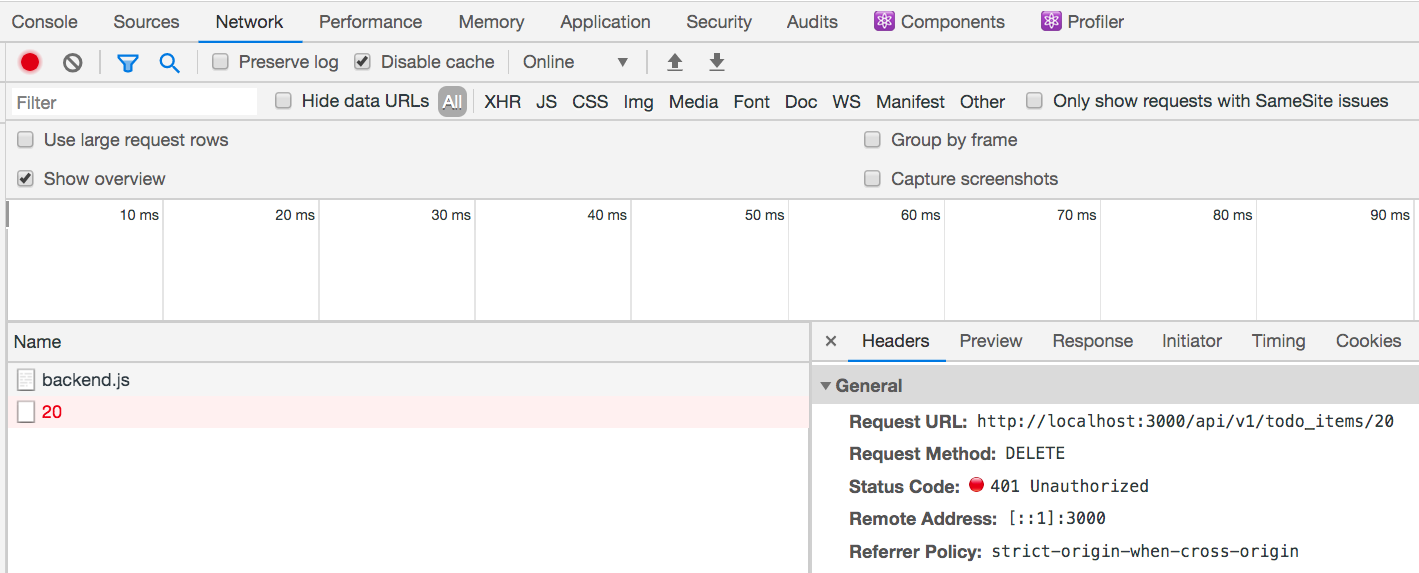
User’sTodoItem. - Assuming you’re still logged into the application, open up the developer console and paste the following and hit enter. Note that the url is now
http://localhost:3000/api/v1/todo_items/20, which does not belong to user-1@example.com.

    var csrfToken = document.querySelector("[name=csrf-token]");
    fetch("http://localhost:3000/api/v1/todo*items/20", {
      credentials: "include",
      headers: {
        accept: "application/json, text/plain, */_",
        "accept-language": "en-US,en;q=0.9",
        "cache-control": "no-cache",
        pragma: "no-cache",
        "sec-fetch-dest": "empty",
        "sec-fetch-mode": "cors",
        "sec-fetch-site": "same-origin",
        "x-csrf-token": csrfToken.content,
      },
      referrer: "http://localhost:3000/",
      referrerPolicy: "strict-origin-when-cross-origin",
      body: null,
      method: "DELETE",
      mode: "cors",
    });
If you open up your network tab you should see the following under Headers
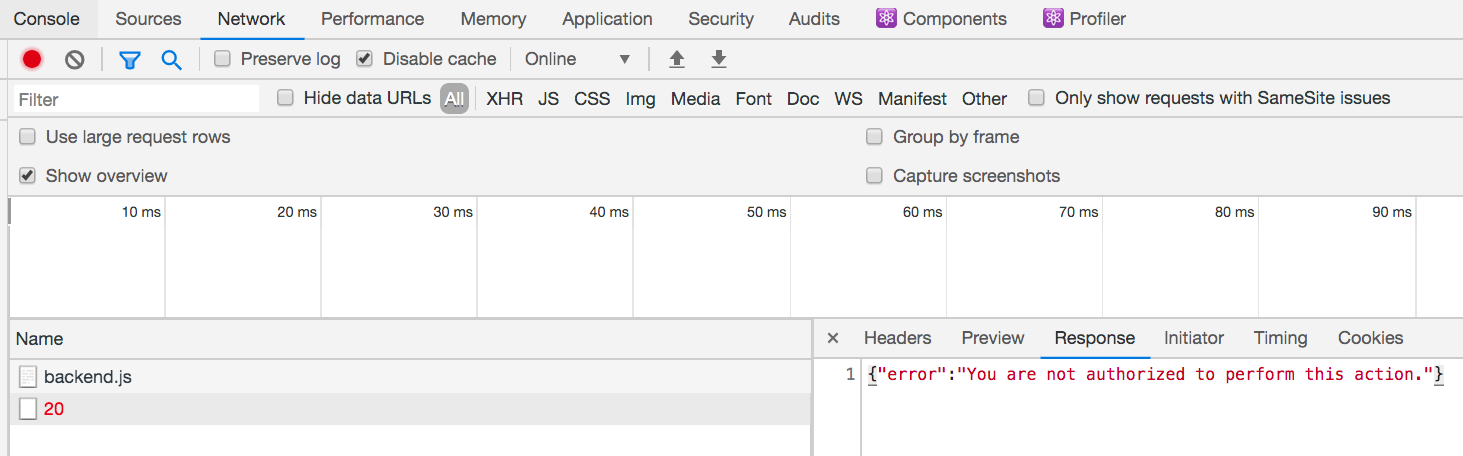
Furthermore, if you look under Response you’ll see the response.
Step 5: Create a React Application
Now that we have a fully functioning API, we can create our front-end in React. Before we get started, let’s remove the sample React application that was created when we generated our Rails application. I recommend you install React Developer Tools, as it will help you debug.
- In a new terminal window, run
rm app/javascript/packs/hello_react.jsx. - Open
app/javascript/packs/application.jsand remove therequire("./hello_react");line.
If you open up a browser and navigate to http://localhost:3000/ you should no longer see the Hello React! message on the bottom of the page.

Create TodoApp Component
Let’s start off by creating our base component which will contain our React application.
-
In a new terminal window, run the following commands.
mkdir app/javascript/packs/components touch app/javascript/packs/components/TodoApp.jsx -
Open
TodoApp.jsxand add the following.// app/javascript/packs/components/TodoApp.jsx import React from "react"; import ReactDOM from "react-dom"; class TodoApp extends React.Component { render() { return <p>TodoApp</p>; } } document.addEventListener("turbolinks:load", () => { const app = document.getElementById("todo-app"); app && ReactDOM.render(<TodoApp />, app); });Note that we only mount our React application once the
turbolinks:loadevent has fired. This a specific to Rails, since Rails ships with Turbolinks. -
Open
app/views/pages/my_todo_items.html.erband replace the contents of the file with the following.<%# app/views/pages/my_todo_items.html.erb %> <h1>My To Do Items</h1> <div id="todo-app"></div> -
Open
app/javascript/packs/application.jsand addrequire("./components/TodoApp");// app/javascript/packs/application.js require("./components/TodoApp"); require("bootstrap"); import "bootstrap/dist/css/bootstrap";
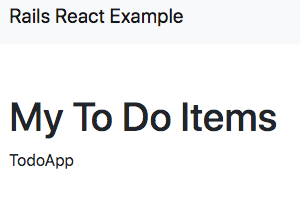
If you login to the application and visit http://localhost:3000/ you should see that “TodoApp” has loaded.
Display TodoItems
Now we want to display our TodoItems in our TodoApp.
Create TodoItems and TodoItem Components
- In a new terminal window, run
touch app/javascript/packs/components/TodoItems.jsx. -
Add the following to
app/javascript/packs/components/TodoItems.jsx.// app/javascript/packs/components/TodoItems.jsx import React from "react"; class TodoItems extends React.Component { constructor(props) { super(props); } render() { return ( <> <div className="table-responsive"> <table className="table"> <thead> <tr> <th scope="col">Status</th> <th scope="col">Item</th> <th scope="col" className="text-right"> Actions </th> </tr> </thead> <tbody>{this.props.children}</tbody> </table> </div> </> ); } } export default TodoItems;The
<TodoItems>component is simply atablethat will hold individual<TodoItems>via{this.props.children}. - In a new terminal window, run
touch app/javascript/packs/components/TodoItem.jsx. -
Add the following to
app/javascript/packs/components/TodoItem.jsx.// app/javascript/packs/components/TodoItem.jsx import React from "react"; import PropTypes from "prop-types"; class TodoItem extends React.Component { constructor(props) { super(props); this.state = { complete: this.props.todoItem.complete, }; } render() { const { todoItem } = this.props; return ( <tr className={`${this.state.complete ? "table-light" : ""}`}> <td> <svg className={`bi bi-check-circle ${ this.state.complete ? `text-success` : `text-muted` }`} width="2em" height="2em" viewBox="0 0 20 20" fill="currentColor" xmlns="http://www.w3.org/2000/svg" > <path fillRule="evenodd" d="M17.354 4.646a.5.5 0 010 .708l-7 7a.5.5 0 01-.708 0l-3-3a.5.5 0 11.708-.708L10 11.293l6.646-6.647a.5.5 0 01.708 0z" clipRule="evenodd" /> <path fillRule="evenodd" d="M10 4.5a5.5 5.5 0 105.5 5.5.5.5 0 011 0 6.5 6.5 0 11-3.25-5.63.5.5 0 11-.5.865A5.472 5.472 0 0010 4.5z" clipRule="evenodd" /> </svg> </td> <td> <input type="text" defaultValue={todoItem.title} disabled={this.state.complete} className="form-control" id={`todoItem__title-${todoItem.id}`} /> </td> <td className="text-right"> <div className="form-check form-check-inline"> <input type="boolean" defaultChecked={this.state.complete} type="checkbox" className="form-check-input" id={`complete-${todoItem.id}`} /> <label className="form-check-label" htmlFor={`complete-${todoItem.id}`} > Complete? </label> </div> <button className="btn btn-outline-danger">Delete</button> </td> </tr> ); } } export default TodoItem; TodoItem.propTypes = { todoItem: PropTypes.object.isRequired, };
Fetch Todo Items from the API
- In a new terminal window run
yarn add axios. -
Open
app/javascript/packs/components/TodoApp.jsxand add the following.// app/javascript/packs/components/TodoApp.jsx class TodoApp extends React.Component { constructor(props) { super(props); this.state = { todoItems: [], }; } render() { return <p>TodoApp</p>; } }We need to create an empty
statearray that will hold our<TodoItems>. -
Import
axiosinto the<TodoApp>component.// app/javascript/packs/components/TodoApp.jsx import React from "react"; import ReactDOM from "react-dom"; import axios from "axios"; class TodoApp extends React.Component {} - Load
TodoItemsintostate.
    // app/javascript/packs/components/TodoApp.jsx
    import React from "react";
    import ReactDOM from "react-dom";

    import axios from "axios";
    class TodoApp extends React.Component {
      constructor(props) {
        super(props);
        this.state = {
          todoItems: [],
        };
        this.getTodoItems = this.getTodoItems.bind(this);
      }
      componentDidMount() {
        this.getTodoItems();
      }
      getTodoItems() {
        axios
          .get("/api/v1/todo_items")
          .then((response) => {
            const todoItems = response.data;
            this.setState({ todoItems });
          })
          .catch((error) => {
            console.log(error);
          });
      }
    }
This is a big step, so let’s go over it piece be piece.
- First we create a
getTodoItemsmethod that hits our API’sindexaction at/api/v1/todo_items. - If the request is successful, we load that data into
stateviathis.setState({ todoItems });, otherwise we log the error. - Then, we call
getTodoItems()when the<TodoApp>component loads via thecomponentDidMount()call. - Finally, we bind
getTodoItemsin order for the keywordthisto work in ourcomponentDidMount()callback.
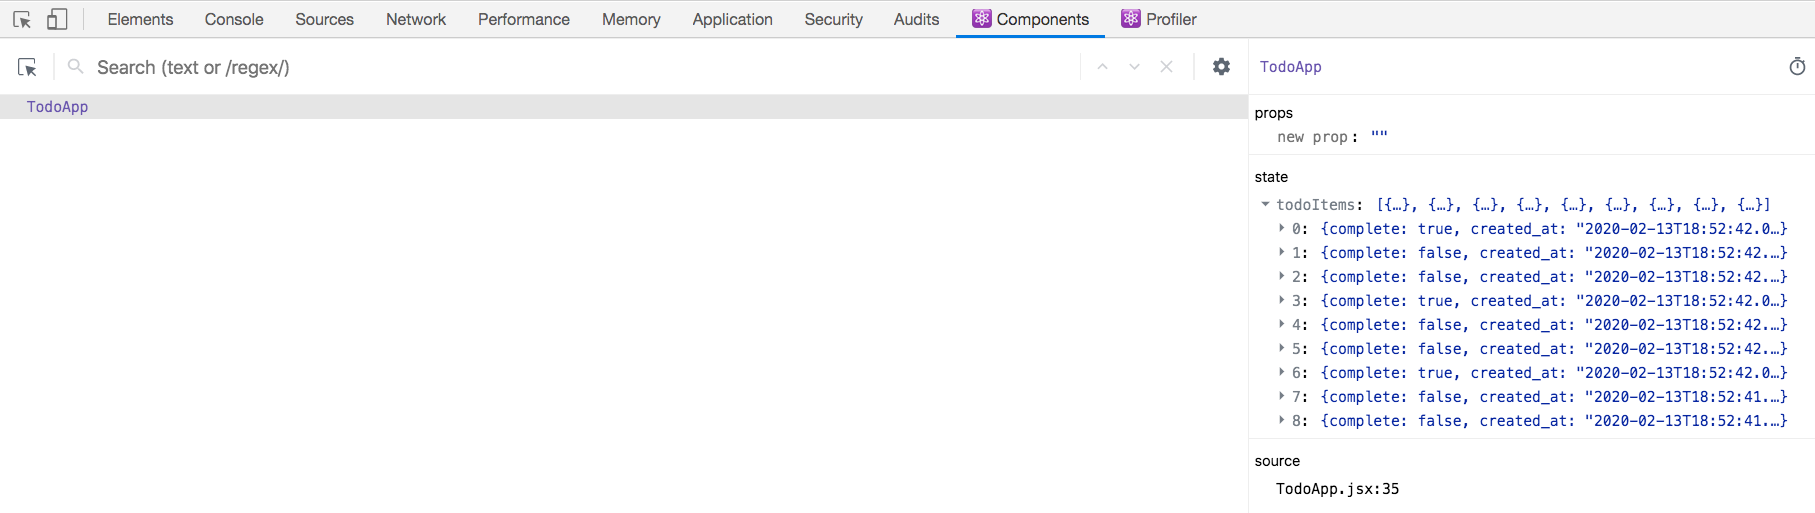
If you open your React developer tools, you should see that the todoItems state array has items.
Render TodoItem and TodoItem Components
Now that we’re successfully updating state, let’s render the TodoItems and TodoItem in our application.
- Open
app/javascript/packs/components/TodoApp.jsxand add the following.
    // app/javascript/packs/components/TodoApp.jsx
    import React from "react";
    import ReactDOM from "react-dom";

    import axios from "axios";

    import TodoItems from "./TodoItems";
    import TodoItem from "./TodoItem";
    class TodoApp extends React.Component {
      constructor(props) {
        super(props);
        this.state = {
          todoItems: [],
        };
        this.getTodoItems = this.getTodoItems.bind(this);
      }
      componentDidMount() {
        this.getTodoItems();
      }
      getTodoItems() {
        axios
          .get("/api/v1/todo_items")
          .then((response) => {
            const todoItems = response.data;
            this.setState({ todoItems });
          })
          .catch((error) => {
            console.log(error);
          });
      }
      render() {
        return (
          <TodoItems>
            {this.state.todoItems.map((todoItem) => (
              <TodoItem key={todoItem.id} todoItem={todoItem} />
            ))}
          </TodoItems>
        );
      }
    }
- First we import the
<TodoItems>and<TodoItem>components. - Then we display them via our
rendermethod. - We use
Array.mapto map over eachtodoIteminthis.state.todoItems, making sure to pass a unique value into thekeyattribute. Since our Rails application automatically assigns a unique value to eachidcolumn in the database, we can usetodoItem.id. Finally, we pass thetodoItemObject into thetodoItemattribute as props.
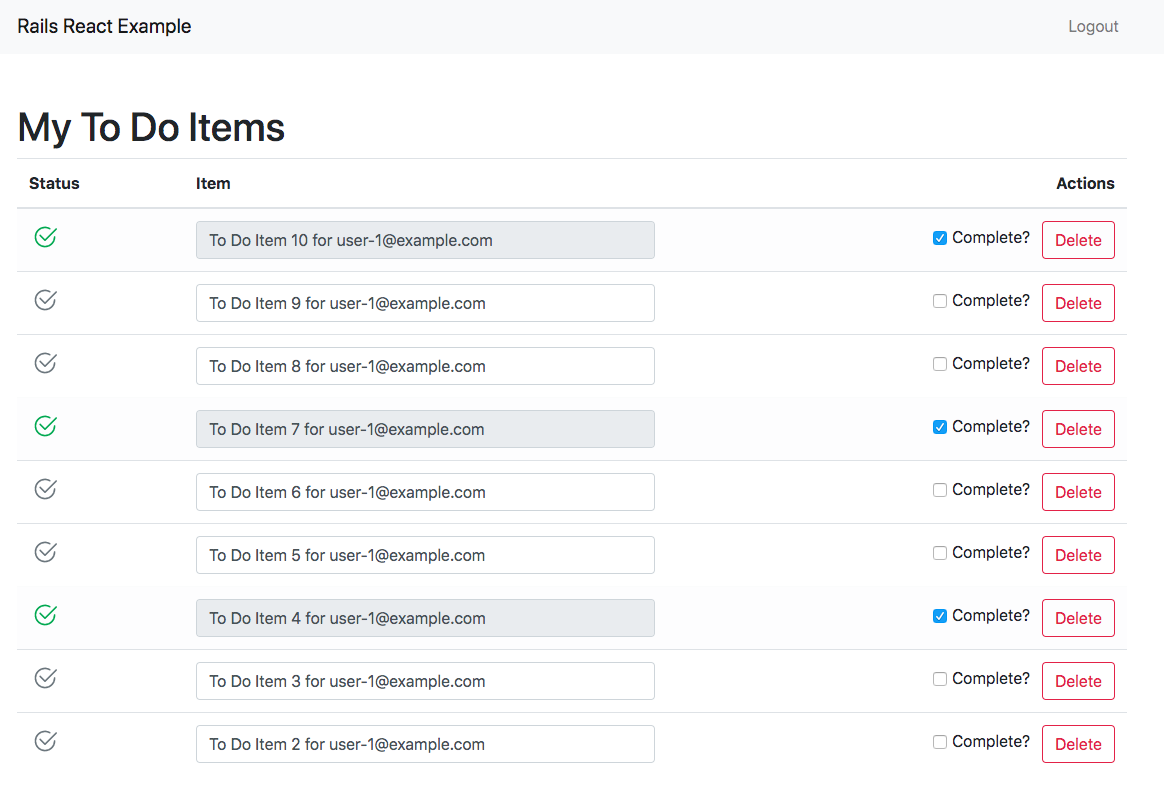
If you login to the application and visit http://localhost:3000/ you should see that our items are loading.
Creating TodoItems
Now that we’ve loaded our TodoItems into our application, we need a way to add more.
Create TodoForm
-
In a new terminal window run
touch app/javascript/packs/components/TodoForm.jsxand add the following.// app/javascript/packs/components/TodoForm.jsx import React from "react"; import PropTypes from "prop-types"; import axios from "axios"; class TodoForm extends React.Component { constructor(props) { super(props); this.handleSubmit = this.handleSubmit.bind(this); this.titleRef = React.createRef(); } handleSubmit(e) { e.preventDefault(); axios .post("/api/v1/todo_items", { todo_item: { title: this.titleRef.current.value, complete: false, }, }) .then((response) => { const todoItem = response.data; this.props.createTodoItem(todoItem); }) .catch((error) => { console.log(error); }); e.target.reset(); } render() { return ( <form onSubmit={this.handleSubmit} className="my-3"> <div className="form-row"> <div className="form-group col-md-8"> <input type="text" name="title" ref={this.titleRef} required className="form-control" id="title" placeholder="Write your todo item here..." /> </div> <div className="form-group col-md-4"> <button className="btn btn-outline-success btn-block"> Add To Do Item </button> </div> </div> </form> ); } } export default TodoForm; TodoForm.propTypes = { createTodoItem: PropTypes.func.isRequired, };
- We create a ref via
this.titleRef = React.createRef();andref={this.titleRef}in order to access data on theinputfield. - We create a
handleSubmitfunction that is called when our form is submitted viaonSubmit={this.handleSubmit}. To ensure the method is called, we addthis.handleSubmit = this.handleSubmit.bind(this);to ourconstructor. - The
handleSubmitmethod prevents the form from submitting by default viae.preventDefault();, and instead makes a POST request to thecreateaction on our API via axios. If the request is successful, we create a newTodoItemby callingthis.props.createTodoItem(todoItem);. Note that we have not created this method yet. -
Note that we need to format out POST request as follows, as this is how Rails expects to receive the POST request. Be sure to set
completetofalse, since a user wouldn’t be adding a completedTodoItemto their list.todo_item: { title: this.titleRef.current.value, complete: false }
Create createTodoItem Method
Now we need to create a method that will update our application’s state which will then allow the new TodoItem to be rendered to the page.
- Open up
app/javascript/packs/components/TodoApp.jsxand add the following.
    // app/javascript/packs/components/TodoApp.jsx
    import React from "react";
    import ReactDOM from "react-dom";

    import axios from "axios";

    import TodoItems from "./TodoItems";
    import TodoItem from "./TodoItem";
    import TodoForm from "./TodoForm";
    class TodoApp extends React.Component {
      constructor(props) {
        super(props);
        this.state = {
          todoItems: [],
        };
        this.getTodoItems = this.getTodoItems.bind(this);
        this.createTodoItem = this.createTodoItem.bind(this);
      }

      createTodoItem(todoItem) {
        const todoItems = [todoItem, ...this.state.todoItems];
        this.setState({ todoItems });
      }
      render() {
        return (
          <>
            <TodoForm createTodoItem={this.createTodoItem} />

              {this.state.todoItems.map((todoItem) => (
                <TodoItem key={todoItem.id} todoItem={todoItem} />
              ))}

          </>
        );
      }
    }
- First we import our
<TodoForm>component. - Then we bind
createTodoItemin order for the keywordthisto work when called in the<TodoForm>component. - Next we create our
createTodoItemmethod which takes in atodoItemobject. We create a new array to ensure we don’t mutate state.- Note that we use the spread syntax to build our new array.
- Note that we also place the new
todoItemfirst in the array, since we’re displaying ourTodoItemsin the order in which they were created. You’ll remember ourdefault_scopeis set toorder(created_at: :desc)inapp/models/todo_item.rb.
- Finally, we add our
<TodoForm>component to therendermethod.- We add a
createTodoItemprop and pass it thecreateTodoItemmethod in order for the form to updated state. - Note that we wrap the output in
<></>, which is a React fragment.
- We add a
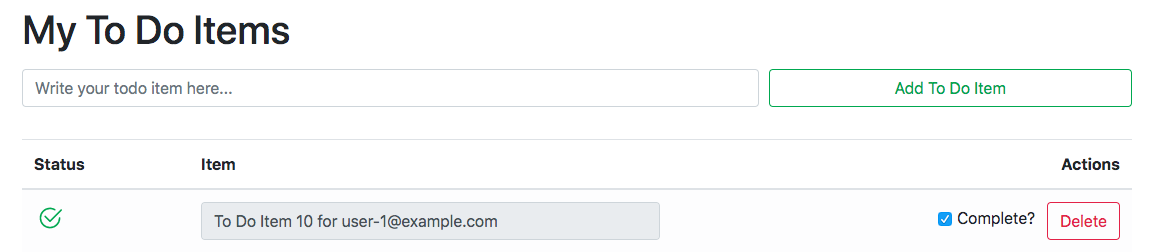
If you login to the application and visit http://localhost:3000/ you should see that the TodoForm is loading.
However, if you try to add a new item, you’ll notice that it doesn’t work. This is because we need to account for the CSRF Countermeasures.
Account for csrf-token
On every page of our Rails application, there is a meta_tag with a csrf-token. This token needs to be passed into any request, which is what var csrfToken = document.querySelector('[name=csrf-token]'); does.
Since our application requires us to pass a csrf-token into the header of any post request, we need to create a new component.
-
In a new terminal window run
touch app/javascript/packs/components/AxiosHeaders.jsxand add the following.// app/javascript/packs/components/AxiosHeaders.jsx import axios from "axios"; const setAxiosHeaders = () => { const csrfToken = document.querySelector("[name=csrf-token]"); if (!csrfToken) { return; } const csrfTokenContent = csrfToken.content; csrfTokenContent && (axios.defaults.headers.common["X-CSRF-TOKEN"] = csrfTokenContent); }; export default setAxiosHeaders;- First we search for the
metatag that contains thecsrf-tokenand save it tocsrfToken. - If the page doesn’t contain a
csrf-token, we stop the function. Otherwise, we see if the thecsrf-tokenhas acontentkey, and use that value in ourheader.
- First we search for the
-
Next, open
app/javascript/packs/components/TodoForm.jsxand add the following.// app/javascript/packs/components/TodoForm.jsx import React from "react"; import PropTypes from "prop-types"; import axios from "axios"; import setAxiosHeaders from "./AxiosHeaders"; class TodoForm extends React.Component { constructor(props) { super(props); this.handleSubmit = this.handleSubmit.bind(this); this.titleRef = React.createRef(); } handleSubmit(e) { e.preventDefault(); setAxiosHeaders(); } }- Here we’re simply importing our
<setAxiosHeaders>component, and calling it before we make ourpostrequest.
- Here we’re simply importing our
Now if you try and add a new TodoItem, it should successfully load.
Deleting TodoItems
Now that we’re able to add TodoItems, let’s create the ability to have them removed.
-
Open
app/javascript/packs/components/TodoItem.jsxand add the following.// app/javascript/packs/components/TodoItem.jsx import React from "react"; import PropTypes from "prop-types"; import axios from "axios"; import setAxiosHeaders from "./AxiosHeaders"; class TodoItem extends React.Component { constructor(props) { super(props); this.state = { complete: this.props.todoItem.complete, }; this.handleDestroy = this.handleDestroy.bind(this); this.path = `/api/v1/todo_items/${this.props.todoItem.id}`; } handleDestroy() { setAxiosHeaders(); const confirmation = confirm("Are you sure?"); if (confirmation) { axios .delete(this.path) .then((response) => { this.props.getTodoItems(); }) .catch((error) => { console.log(error); }); } } render() { const { todoItem } = this.props; return ( <button onClick={this.handleDestroy} className="btn btn-outline-danger"> Delete </button> ); } } export default TodoItem; TodoItem.propTypes = { todoItem: PropTypes.object.isRequired, getTodoItems: PropTypes.func.isRequired, };- First we import both
axiosandsetAxiosHeadersso that we’ll be able to make requests to our API. - Then we bind
handleDestroyin order for the keywordthisto work when called in the Deletebutton. - We store the API endpoint of the
TodoIteminthis.pathwithin theconstructorfunction. This will be helpful later when we need to update ourTodoItems. - We create a
handleDestroymethod that sends adeleterequest to the API. If the request is successful, then we render theTodoItems. Note that we need to add thegetTodoItemspropto our component. - To avoid the user accidently deleting a
TodoItem, we add a confirmation message first. - Finally, we require that the
getTodoItemsprop is set. Note that we still need to do this.
- First we import both
-
Next, open
app/javascript/packs/components/TodoApp.jsxand add the following.// app/javascript/packs/components/TodoApp.jsx class TodoApp extends React.Component { constructor(props) {} render() { return ( <> <TodoForm createTodoItem={this.createTodoItem} /> <TodoItems> {this.state.todoItems.map((todoItem) => ( <TodoItem key={todoItem.id} todoItem={todoItem} getTodoItems={this.getTodoItems} /> ))} </TodoItems> </> ); } }- Here we simply add a
getTodoItemsprop to the<TodoItem>component. This allows the<TodoItem>component to update state.
- Here we simply add a
If you login to the application and visit http://localhost:3000/ you should see that you’re now able to delete TodoItems.
Updating TodoItems
Now that we’re able to create and destroy TodoItems, let’s add the ability to edit them.
-
Open up
app/javascript/packs/components/TodoItem.jsxand add the following.// app/javascript/packs/components/TodoItem.jsx class TodoItem extends React.Component { constructor(props) { this.handleChange = this.handleChange.bind(this); this.updateTodoItem = this.updateTodoItem.bind(this); this.inputRef = React.createRef(); this.completedRef = React.createRef(); } handleChange() { this.updateTodoItem(); } updateTodoItem() { this.setState({ complete: this.completedRef.current.checked }); setAxiosHeaders(); axios .put(this.path, { todo_item: { title: this.inputRef.current.value, complete: this.completedRef.current.checked, }, }) .then((response) => {}) .catch((error) => { console.log(error); }); } render() { const { todoItem } = this.props; return ( <tr className={`${this.state.complete ? "table-light" : ""}`}> <td></td> <td> <input type="text" defaultValue={todoItem.title} disabled={this.state.complete} onChange={this.handleChange} ref={this.inputRef} className="form-control" id={`todoItem__title-${todoItem.id}`} /> </td> <td className="text-right"> <div className="form-check form-check-inline"> <input type="boolean" defaultChecked={this.state.complete} type="checkbox" onChange={this.handleChange} ref={this.completedRef} className="form-check-input" id={`complete-${todoItem.id}`} /> <label className="form-check-label" htmlFor={`complete-${todoItem.id}`} > Complete? </label> </div> <button onClick={this.handleDestroy} className="btn btn-outline-danger" > Delete </button> </td> </tr> ); } } export default TodoItem;- First, we bind
handleChangeandupdateTodoItemin order for the keywordthisto work in any callbacks. - Then we create a ref to the inout and checkbox field via
this.inputRef = React.createRef();andthis.completedRef = React.createRef();. This is used to get the values from these fields.- Note that we also add
ref={this.inputRef}andref={this.inputRef}to theinputandcheckboxrespectively.
- Note that we also add
- Then we build the
updateTodoItemmethod.- We immediately update
stateif thecheckboxis changed viathis.setState({ complete: this.completedRef.current.checked });. This is because we need to immediately toggle theTodoItemdepending on whether or not it’s complete. - We then make a
postrequest with the updatedTodoItemdata. Note that it does not updatestate. This is because the data in theinputfield is already up to date, and does not required a refresh. However, if the user were to refresh the page, the new dat would persist.
- We immediately update
- Finally, we create a
handleChangemethod that calls theupdateTodoItemmethod. This is called viaonChange={this.handleChange}.
- First, we bind
If you login to the application and visit http://localhost:3000/ you should see that you’re now able to update TodoItems.
Debounce Requests
Although we’re able to successfully update TodoItems, there is a problem. Every time we type into the input field, we make a request to the server. This is problematic because it means our API it being hit very frequently as seen below.
One way to solve this is to debounce these requests. Rather than roll out our own debounce function, we’ll use Lodash, since heir implementation is battle tested.
The Debounce technique allow us to “group” multiple sequential calls in a single one.
- In a new terminal window, run
yarn add lodash. -
Open up
app/javascript/packs/components/TodoItem.jsxand make the following edits.// app/javascript/packs/components/TodoItem.jsx import React from "react"; import PropTypes from "prop-types"; import _ from "lodash"; import axios from "axios"; import setAxiosHeaders from "./AxiosHeaders"; class TodoItem extends React.Component { constructor(props) {} handleChange() { this.setState({ complete: this.completedRef.current.checked, }); this.updateTodoItem(); } updateTodoItem = _.debounce(() => { setAxiosHeaders(); axios .put(this.path, { todo_item: { title: this.inputRef.current.value, complete: this.completedRef.current.checked, }, }) .then((response) => {}) .catch((error) => { console.log(error); }); }, 1000); }- First we move
setStateinto thehandleChangemethod.- This ensures that the
stateis immediately updated when theonChangeevent is fired.
- This ensures that the
- Next we update our
updateTodoItemmethod to call adebouncefunction which will be invoked 1000 milliseconds (1 second) after it is called.- This means that no posts requests will be made to our API until 1 second after a user is done typing or checking/un-checking the checkbox.
- First we move
Filtering TodoItems
Now that we can successfully create, update, an delete TodoItems, let’s add the ability to filter them.
-
Open up
app/javascript/packs/components/TodoItems.jsxand add the following.// app/javascript/packs/components/TodoItems.jsx import React from "react"; import PropTypes from "prop-types"; class TodoItems extends React.Component { constructor(props) { super(props); this.handleClick = this.handleClick.bind(this); } handleClick() { this.props.toggleCompletedTodoItems(); } render() { return ( <> <hr /> <button className="btn btn-outline-primary btn-block mb-3" onClick={this.handleClick} > {this.props.hideCompletedTodoItems ? `Show Completed Items` : `Hide Completed Items `} </button> </> ); } } export default TodoItems; TodoItems.propTypes = { toggleCompletedTodoItems: PropTypes.func.isRequired, hideCompletedTodoItems: PropTypes.bool.isRequired, };- First we import
PropTypesso that we can handle typechecking, and ensure the<TodoItems/>component receives the correctprops.- We declare the what value are required, and their type in the
TodoItems.propTypesassignment at at the bottom of the file.
- We declare the what value are required, and their type in the
- Then we bind
handleClickin order for the keywordthisto work whenonClickevent is fired. - Next we create the
handleClickfunction which will calltoggleCompletedTodoItems.- Note that this function has not been created yet, but it will update the
statein<TodoApp/>, which can be passed down asprops.
- Note that this function has not been created yet, but it will update the
- Finally, we add a
<button>to the component.
- First we import
-
Next, open
app/javascript/packs/components/TodoItem.jsxand add the following.// app/javascript/packs/components/TodoItem.jsx class TodoItem extends React.Component { constructor(props) {} render() { const { todoItem } = this.props; return ( <tr className={`${ this.state.complete && this.props.hideCompletedTodoItems ? `d-none` : "" } ${this.state.complete ? "table-light" : ""}`} > <td></td> <td></td> <td className="text-right"></td> </tr> ); } } export default TodoItem; TodoItem.propTypes = { todoItem: PropTypes.object.isRequired, getTodoItems: PropTypes.func.isRequired, hideCompletedTodoItems: PropTypes.bool.isRequired, };- We create a ternary operator that will render a class to either show or hide the
<TodoItem/>depending on whether or not thehideCompletedTodoItemsandpropsis true or not.- Note that this
propwill be passed down from the<TodoApp/>component, which will hold the value ofhideCompletedTodoItemsinstate.
- Note that this
- We create a ternary operator that will render a class to either show or hide the
-
Next, open
app/javascript/packs/components/TodoApp.jsxand add the following.// app/javascript/packs/components/TodoApp.jsx class TodoApp extends React.Component { constructor(props) { super(props); this.state = { todoItems: [], hideCompletedTodoItems: false, }; this.getTodoItems = this.getTodoItems.bind(this); this.createTodoItem = this.createTodoItem.bind(this); this.toggleCompletedTodoItems = this.toggleCompletedTodoItems.bind(this); } toggleCompletedTodoItems() { this.setState({ hideCompletedTodoItems: !this.state.hideCompletedTodoItems, }); } render() { return ( <> <TodoForm createTodoItem={this.createTodoItem} /> <TodoItems toggleCompletedTodoItems={this.toggleCompletedTodoItems} hideCompletedTodoItems={this.state.hideCompletedTodoItems} > {this.state.todoItems.map((todoItem) => ( <TodoItem key={todoItem.id} todoItem={todoItem} getTodoItems={this.getTodoItems} hideCompletedTodoItems={this.state.hideCompletedTodoItems} /> ))} </TodoItems> </> ); } }- First we add
hideCompletedTodoItemstostate, and set it tofalsebe default.- This will allow us to pass the value of
hideCompletedTodoItemsinto both the<TodoItems/>and<TodoItem/>components asprops. Whenever thehideCompletedTodoItemsstatechanges, our<TodoItems/>and<TodoItem/>components will updated accordingly.
- This will allow us to pass the value of
- Next, we bind
toggleCompletedTodoItemsin order for the keywordthisto work in any callbacks. - Then we add
toggleCompletedTodoItemsandhideCompletedTodoItemspropsto our<TodoItems/>component so it knows what text to display on the button, as well as trigger astatechange. - Finally we add
hideCompletedTodoItemspropsto our<TodoItem/>component so that it knows where or not to hide completed items.
- First we add
If you login to the application and visit http://localhost:3000/ you should see that you’re now able to filter TodoItems.
Display a Spinner When App is Loading
Right now our application loads very quickly, and it’s hard to notice that the screen is ever blank before we pull from our API. However, if there was a network issue, then users might think the application was broken. In order to improve the UI, let’s a a loading graphic.
Create Spinner Component
First we’ll need to create a spinner. Since we’re using Bootstrap, we’ll just reach for a spinner.
-
In a new terminal window, run
touch app/javascript/packs/components/Spinner.jsxand add the following to the file.// app/javascript/packs/components/Spinner.jsx import React from "react"; const Spinner = () => { return ( <div className="d-flex align-items-center justify-content-center py-5"> <div className="spinner-border" role="status"> <span className="sr-only">Loading...</span> </div> </div> ); }; export default Spinner;
Display Spinner
Now that we have a spinner, we need to dynamically have it load.
-
Open
app/javascript/packs/components/TodoApp.jsxand add the following.// app/javascript/packs/components/TodoApp.jsx import Spinner from "./Spinner"; class TodoApp extends React.Component { constructor(props) { super(props); this.state = { todoItems: [], hideCompletedTodoItems: false, isLoading: true, }; this.getTodoItems = this.getTodoItems.bind(this); this.createTodoItem = this.createTodoItem.bind(this); this.toggleCompletedTodoItems = this.toggleCompletedTodoItems.bind(this); } componentDidMount() { this.getTodoItems(); } getTodoItems() { axios .get("/api/v1/todo_items") .then((response) => { this.setState({ isLoading: true }); const todoItems = response.data; this.setState({ todoItems }); this.setState({ isLoading: false }); }) .catch((error) => { this.setState({ isLoading: true }); console.log(error); }); } render() { return ( <> {!this.state.isLoading && ( <> <TodoForm createTodoItem={this.createTodoItem} /> <TodoItems toggleCompletedTodoItems={this.toggleCompletedTodoItems} hideCompletedTodoItems={this.state.hideCompletedTodoItems} > {this.state.todoItems.map((todoItem) => ( <TodoItem key={todoItem.id} todoItem={todoItem} getTodoItems={this.getTodoItems} hideCompletedTodoItems={this.state.hideCompletedTodoItems} /> ))} </TodoItems> </> )} {this.state.isLoading &&} </> ); } } - First we import our
<Spinner/>component. - Then we add a
isLoadingkey tostate, and set it totrue. - Next we update the
isLoadingstatein ourgetTodoItemsmethod.- As we make a GET request to the API, we set the
isLoadingstatetotrue. Even though the defaultisLoadingstateis set totrue, that could change throughout the lifecycle of our application. - If we make a successful request to the API, we update the
isLoadingstatetofalse. If we return an error, we set theisLoadingstatetotrue.
- As we make a GET request to the API, we set the
- Finally we wrap our
<TodoForm/>and<TodoItems/>components in a conditional. Unless theisLoadingstateistrue, we load the application. Otherwise we load the<Spinner/>.
- First we import our
In order to simulate this, open up your React Developer Tools and update the isLoading state to false.
Displaying Errors
Right now our application only logs errors to the console. In order to improve the UI, let’s display helpful error messages.
-
In a new terminal window run
touch app/javascript/packs/components/ErrorMessage.jsxand add the following to the file.// app/javascript/packs/components/ErrorMessage.jsx import React from "react"; const ErrorMessage = (props) => { return ( <div className="alert alert-danger" role="alert"> <p className="mb-0">There was an error.</p> </div> ); }; export default ErrorMessage; -
Open up
app/javascript/packs/components/TodoApp.jsxand add the following.// app/javascript/packs/components/TodoApp.jsx import ErrorMessage from "./ErrorMessage"; class TodoApp extends React.Component { constructor(props) { super(props); this.state = { todoItems: [], hideCompletedTodoItems: false, isLoading: true, errorMessage: null, }; } render() { return ( <> {this.state.errorMessage && ( <ErrorMessage errorMessage={this.state.errorMessage} /> )} </> ); } }- First we import the
<ErrorMessage/>component. - Next we add a
errorMessagekey intostate, and set the value tonull. - Finally, we display the
<ErrorMessage/>component if there is aerrorMessage.
- First we import the
In order to simulate this, open up your React Developer Tools and update the errorMessage state to true.
When Creating TodoItems
Let’s handle errors that occur when a user creates or updates a TodoItem.
-
Open up
app/javascript/packs/components/TodoApp.jsxand add the following.// app/javascript/packs/components/TodoApp.jsx class TodoApp extends React.Component { constructor(props) { this.handleErrors = this.handleErrors.bind(this); this.clearErrors = this.clearErrors.bind(this); } handleErrors(errorMessage) { this.setState({ errorMessage }); } clearErrors() { this.setState({ errorMessage: null, }); } render() { return ( <> {this.state.errorMessage && ( <ErrorMessage errorMessage={this.state.errorMessage} /> )} {!this.state.isLoading && ( <> <TodoForm createTodoItem={this.createTodoItem} handleErrors={this.handleErrors} clearErrors={this.clearErrors} /> </> )} {this.state.isLoading &&} </> ); } } - First we bind
handleErrorsandclearErrorsin order for the keywordthisto work in any callbacks. - Then we create a
handleErrorsmethod that takes the error message as an argument and use it to update theerrorMessagestate. - Next we create a
clearErrorsmethod that sets theerrorMessagestatetonull. - Finally we add
handleErrorsandclearErrorsas props on the<TodoForm/>component.
- First we bind
-
Open up
app/javascript/packs/components/TodoForm.jsxand add the following.// app/javascript/packs/components/TodoForm.jsx class TodoForm extends React.Component { handleSubmit(e) { e.preventDefault(); setAxiosHeaders(); axios .post("/api/v1/todo_items", { todo_item: { title: this.titleRef.current.value, complete: false, }, }) .then((response) => { const todoItem = response.data; this.props.createTodoItem(todoItem); this.props.clearErrors(); }) .catch((error) => { this.props.handleErrors(error); }); e.target.reset(); } render() { return ( <form onSubmit={this.handleSubmit} className="my-3"> <div className="form-row"> <div className="form-group col-md-8"> <input type="text" name="title" ref={this.titleRef} required className="form-control" id="title" placeholder="Write your todo item here..." /> </div> <div className="form-group col-md-4"> <button className="btn btn-outline-success btn-block"> Add To Do Item </button> </div> </div> </form> ); } } export default TodoForm; TodoForm.propTypes = { createTodoItem: PropTypes.func.isRequired, handleErrors: PropTypes.func.isRequired, clearErrors: PropTypes.func.isRequired, };- First we add
this.props.clearErrors();to thehandleSubmitmethod if the POST request was successful. This will remove any errors the were previously displaying. - Then we replace the
console.log(error)withthis.props.handleErrors(error);in order to display the error message. - Finally, we add
handleErrorsandclearErrorsto ourTodoForm.propTypesassignment.
- First we add
-
Next, open up
app/javascript/packs/components/ErrorMessage.jsxand add the following.// app/javascript/packs/components/ErrorMessage.jsx import React from "react"; import PropTypes from "prop-types"; import _ from "lodash"; const ErrorMessage = (props) => { const data = _.get(props.errorMessage, "response.data", null); if (data) { const keys = Object.keys(data); return keys.map((key) => { return ( <div key={new Date()} className="alert alert-danger" role="alert"> <p>{key}</p> <ul> <li>{data[key].map((message) => message)}</li> </ul> </div> ); }); } else { return ( <div className="alert alert-danger" role="alert"> <p className="mb-0">There was an error.</p> </div> ); } }; export default ErrorMessage; ErrorMessage.propTypes = { errorMessage: PropTypes.object.isRequired, };- First we import
PropTypesso that we can handle typechecking, and ensure the<ErrorMessage/>component receives the correctprops. - Then we import
lodash, so that we can use the .get() method. - Next, we assign
datato the value ofprops.errorMessage.response.datasince Rails will return the error in adataObject within aresponseObject.- Note that we are using the .get() method to do this. If this value does not exist, we will return
null.
- Note that we are using the .get() method to do this. If this value does not exist, we will return
- If there is a
dataObject, we iterate over all thekeysin thedataObject and print thevalue.
- First we import
If you temporarily remove the required attribute from the input in the <TodoForm/> component you can test our code by adding an empty TodoItem.
    // app/javascript/packs/components/TodoForm.jsx
    <input
      type="text"
      name="title"
      ref={this.titleRef}
      // required
      className="form-control"
      id="title"
      placeholder="Write your todo item here..."
    />
Notice that the error message disappears once we successfully add a TodoItem. This is because we call this.props.clearErrors(); in the handleSubmit method within the <TodoForm/> component upon a successful POST request.
When Updating TodoItems
Now let’s display errors when updating a TodoItem.
-
Open up
/app/javascript/packs/components/TodoApp.jsxand add the following.// app/javascript/packs/components/TodoApp.jsx class TodoApp extends React.Component { render() { return ( <> {this.state.errorMessage && ( <ErrorMessage errorMessage={this.state.errorMessage} /> )} {!this.state.isLoading && ( <> <TodoForm createTodoItem={this.createTodoItem} handleErrors={this.handleErrors} clearErrors={this.clearErrors} /> <TodoItems toggleCompletedTodoItems={this.toggleCompletedTodoItems} hideCompletedTodoItems={this.state.hideCompletedTodoItems} > {this.state.todoItems.map((todoItem) => ( <TodoItem key={todoItem.id} todoItem={todoItem} getTodoItems={this.getTodoItems} hideCompletedTodoItems={this.state.hideCompletedTodoItems} handleErrors={this.handleErrors} clearErrors={this.clearErrors} /> ))} </TodoItems> </> )} {this.state.isLoading &&} </> ); } } - This will allow our
<TodoItem/>component pass or clear any error messages in to the<TodoApp/>component.
- This will allow our
-
Next, open up
app/javascript/packs/components/TodoItem.jsxand add the following.// app/javascript/packs/components/TodoItem.jsx class TodoItem extends React.Component { constructor(props) {} updateTodoItem = _.debounce(() => { setAxiosHeaders(); axios .put(this.path, { todo_item: { title: this.inputRef.current.value, complete: this.completedRef.current.checked, }, }) .then(() => { this.props.clearErrors(); }) .catch((error) => { this.props.handleErrors(error); }); }, 1000); render() {} } export default TodoItem; TodoItem.propTypes = { todoItem: PropTypes.object.isRequired, getTodoItems: PropTypes.func.isRequired, hideCompletedTodoItems: PropTypes.bool.isRequired, clearErrors: PropTypes.func.isRequired, };- First we clear any errors by calling
this.props.clearErrors();after a successful POST request to the API. - Then, we display any error messages by calling
this.props.handleErrors(error);is the POST request returns an error. - Finally, we require that the
<TodoItem/>be passed aclearErrorsprop.
- First we clear any errors by calling
If you remove the text from TodoItem, you’ll see the error message display.
Notice that the error message disappears once we successfully add content. This is because we call this.props.clearErrors(); in the updateTodoItem method within the <TodoItem/> component upon a successful POST request. Also note that it took 1 second for the message to display. That is because of the _.debounce function.
When Loading TodoItems
Now all we need to do is display any error messages when we make a GET request to our API.
-
Open up
app/javascript/packs/components/TodoApp.jsxand add the following.// app/javascript/packs/components/TodoApp.jsx class TodoApp extends React.Component { constructor(props) {} getTodoItems() { axios .get("/api/v1/todo_items") .then((response) => { this.clearErrors(); this.setState({ isLoading: true }); const todoItems = response.data; this.setState({ todoItems }); this.setState({ isLoading: false }); }) .catch((error) => { this.setState({ isLoading: true }); this.setState({ errorMessage: { message: "There was an error loading your todo items...", }, }); }); } render() {} }- Similar to previous steps, we call
this.clearErrors();upon a successful GET request to our API. - If the GET requests returns an error, we pass a custom error message to the
errorMessagestate.- Note that we pass an Object with a
keyofmessageinto theerrorMessageObject. This is because our<ErrorMessage/>component expects theerrorMessagepropto be an Object.
- Note that we pass an Object with a
- Similar to previous steps, we call
-
Open up
app/javascript/packs/components/ErrorMessage.jsxand add the following.// app/javascript/packs/components/ErrorMessage.jsx const ErrorMessage = (props) => { const data = _.get(props.errorMessage, "response.data", null); const message = _.get(props.errorMessage, "message", null); if (data) { } else if (message) { return ( <div className="alert alert-danger" role="alert"> <p className="mb-0">{message}</p> </div> ); } else { <div className="alert alert-danger" role="alert"> <p className="mb-0">There was an error.</p> </div>; } };- First, we assign
messageto the value ofprops.errorMessage.message.- Note that we are using the .get() method to do this. If this value does not exist, we will return
null.
- Note that we are using the .get() method to do this. If this value does not exist, we will return
- Then we add an
else ifconditional and render the message.
- First, we assign
If you temporarily break the GET request in the getTodoItems method in the <TodoApp/> component, you will see the error display.
    // app/javascript/packs/components/TodoApp.jsx

    class TodoApp extends React.Component {
      constructor(props) {}
      componentDidMount() {
        this.getTodoItems();
      }
      getTodoItems() {
        axios
          .get("/broken-end-point")
          .then((response) => {})
          .catch((error) => {});
      }

      render() {}
    }

Conclusion and Next Steps
As you can see, there’s a lot to consider when building a full-stack web application. However, by learning how to build an API, you have complete control of your data, and avoid vendor lock-in with services like Firebase.
If you decide to deploy with Heroku, you’ll want to use the nodejs and ruby buildpacks
Finally, you’ll want to write tests for your application. Writing tests was beyond the scope of this tutorial, but you can see the tests I wrote, or clone the repo and run the tests locally.