Install Drupal Memcached on a Media Temple DV Server
Site performance is crucial to a good user experience, and also is a factor in SEO. Because Drupal sites can be very query heavy at times, their performance can suffer. Luckily, there are a few caching libraries than can solve this problem and help increase performance. In this tutorial we’re going to install the Memcached library on a Media Temple DV Server, as well as configure the Memcache API and Integration module.
Memcached is described as a…
Free & open source, high-performance, distributed memory object caching system , generic in nature, but intended for use in speeding up dynamic web applications by alleviating database load.
Memcached is an in-memory key-value store for small chunks of arbitrary data (strings, objects) from results of database calls, API calls, or page rendering.
Backup Your Server
Full disclosure, I’m not a server guy. I know basic server configuration settings, and how to navigate the server through the command line. The next steps worked for me, but becuase I’m not a server expert, I recommend you make a full backup of your server before you continue on with this tutorial.
Install Memcached on a Media Temple DV Server
If you’re like me, you probably searched “How to install Memcached on a Media Temple DV Server” and found several results. Unfortunately for me, none of them worked. Again, I’m not a server guy, so I can’t blame the authors as they did provided very details instructions. It was just that I ran into issues where I couldn’t install a certain library, or copy a directory because of they way my server is set up.
Finally, after a lot of searching I stumped upon nLightened Development’s excellent post titled Installing APC Memcached and Varnish on Media Temple DV Level 4 Centos 6.5. I want to give the author(s) of that post full credit for the commands I used to install Memcached on a Media Temple DV Server.
- The first you will need to do is enable root access on your Media Temple DV server.
- Next, you need to ssh into your server. To do that, run
ssh root@yourdomain.com - You’ll be prompted for your password with something like
root@yourdomain.com's password:. You will not see your password being entered when you type it, so it’s helpful to copy and paste. Hit enter. - Once logged in enter
cd ~to ensure you’re in the home directory. -
Finally, run the following commands. Again, this is from nLightened Development’s excellent post titled Installing APC Memcached and Varnish on Media Temple DV Level 4 Centos 6.5
yum install Memcached vim /etc/sysconfig/memcached PORT="11211" USER="memcached" MAXCONN="1024" CACHESIZE="64" OPTIONS="-l 127.0.0.1" chkconfig --add memcached cd /usr/local/src/ wget http://pecl.php.net/get/memcache tar -xvf memcache cd memcache-3.0.8/ /usr/bin/phpize ./configure -enable-memcache make make install echo “extension=memcache.so” > /etc/php.d/memcache.ini service httpd restart - Confirm memcache is installed by running
telnet localhost 11211 -
You should get something similar to the following
Trying ::1... telnet: connect to address ::1: Connection refused Trying 127.0.0.1... Connected to localhost. Escape character is '^]'. - Then run the following
stats -
If everything is setup correctly, you’ll get an output similar to the following
STAT pid 518
STAT uptime 362776
STAT time 1449610483
STAT version 1.4.4
STAT pointer_size 64
STAT rusage_user 8.143761
STAT rusage_system 11.669226
STAT curr_connections 5
STAT total_connections 956
STAT connection_structures 20
STAT cmd_get 122913
STAT cmd_set 29485
STAT cmd_flush 0
STAT get_hits 106004
STAT get_misses 16909
STAT delete_misses 1973
STAT delete_hits 4647
STAT incr_misses 0
STAT incr_hits 0
STAT decr_misses 0
STAT decr_hits 0
STAT cas_misses 0
STAT cas_hits 0
STAT cas_badval 0
STAT auth_cmds 0
STAT auth_errors 0
STAT bytes_read 144024662
STAT bytes_written 359296232
STAT limit_maxbytes 67108864
STAT accepting_conns 1
STAT listen_disabled_num 0
STAT threads 4
STAT conn_yields 0
STAT bytes 9615683
STAT curr_items 5094
STAT total_items 29485
STAT evictions 0
END
Edit php.ini
Now that memcached is installed on your server, you’ll need to edit your domain specific php.ini file. Since we’re dealing with a Media Temple DV, you can simply follow these steps to edit your domain specific php.ini file.
-
Once on the PHP Settings page, scroll to the Additional directives section and add the following lines.
extension=memcache.so memcache.hash_strategy="consistent"If this doesn’t work, you might need to also edited you global php.ini file, but I don’t believe this is necessary.
cd ~ nano /etc/php.ini -
Then add the following
extension=memcache.so memcache.hash_strategy="consistent" -
Finally, restart the server by running
/etc/init.d/httpd restart

Install and Enable the Drupal Memcache API and Integration Module
- Put your site in maintenance mode by going to admin/config/development/maintenance
-
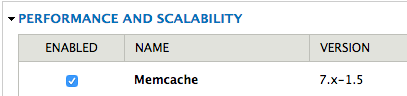
Install and enable Memcache API and Integration
Edit Drupal’s settings.php
-
Add the following to your settings.php file
$conf["cache_backends"][] = "sites/all/modules/memcache/memcache.inc"; $conf["cache_default_class"] = "MemCacheDrupal"; $conf["cache_class_cache_form"] = "DrupalDatabaseCache"; $conf["memcache_servers"] = ["127.0.0.1:11211" => "default"]; $conf["memcache_bins"] = ["cache" => "default"]; -
Take your site back online by going to admin/config/development/maintenance