Configure Travis CI for Ruby on Rails
In this tutorial I am going to show you how to configure Travis CI to run your Rails’ test suite and system tests everytime you push a new change to your repository.
Create a Simple Rail Application
First we’ll need to create simple Rail application. Open up your terminal and run the following commands.
$ rails new rails-travis-ci-example -d=postgresql$ rails db:create$ rails g scaffold Post title body:text
- This step will automatically generate tests and system tests.
$ rails db:migrate
Configure Rails Application to run System Tests in Travis CI
Rails is configured by default to run system tests in Google Chrome. However, I ran into an issue with Travis CI when it came to running system tests using the default configuration. My solution was to update test/application_system_test_case.rb by declearing :headless_chrome instead of the default :chrome setting.
-
Edit
test/application_system_test_case.rb# test/application_system_test_case.rb require "test_helper" class ApplicationSystemTestCase < ActionDispatch::SystemTestCase # ℹ️ Use headless_chrome driven_by :selenium, using: :headless_chrome, screen_size: [1400, 1400] end -
Run the test suite locally to ensure it works and passes.
$ rails test
$ rails test:system
Configure Travis CI to run the Rails Test Suite and System Tests
Next we need to create a .travis.yml file in order for Travis CI to know how to build our application.
-
Creat a
.travis.ymlfile and add the following:language: ruby cache: - bundler - yarn services: - postgresql before_install: - nvm install --lts before_script: - bundle install --jobs=3 --retry=3 - yarn - bundle exec rake db:create - bundle exec rake db:schema:load script: - bundle exec rake test - bundle exec rake test:systemKey Description os Sets the build’s operating system. Note that we did not add an oskey, and are using the default environmentlanguage Selects the language support used for the build. We select rubysince this is a Rails projectcache Activates caching content that does not often change in order to speed up the build process. We add bundlerandyarnsince Rails uses bundler and yarn to managage dependencies.services Services to set up and start. We add postgresqlsince our database is postgresql. You could also addredis.before_install Scripts to run before the install stage. We add nvm install --ltsto use the latest stable version of Node. This will be needed when we runyarnlater.before_script Scripts to run before the script stage. This sets up our Rails application. Note that I do not seed the database, since we only care about the test environment. I run bundle install --jobs=3 --retry=3instead ofbundlebecuase that’s what the documentation recommends.script Scripts to run at the script stage. In our case, we just run our tests. - Log into Travis CI and navigate to
https://travis-ci.org/account/repositories. -
Search for your repository, and it enabled. If your repository doesn’t appear click the Sync account button.
-
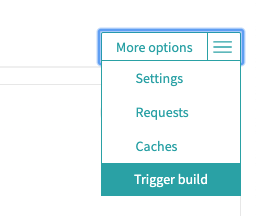
Navigate to your project and trigger a build. Alternatively, make a new commit and push to GitHub to trigger a new build.
-
If you’re using Heroku you can use GitHub as your deployment method and enable automatic deployments, but have it configured to wait for the CI to pass first.